Tämä sivusto käyttää evästeitä. Sivusto käyttää ainoastaan evästeitä, jotka ovat välttämättömiä sen toiminnan kannalta, tai joita tarvitaan käyttäjän asetusten (kuten kieli) muistamiseen. Sivusto ei käytä seurantaevästeitä.Lue lisää käyttöehdoista.
During this course, the students have to design, document, implement and test a Web API, that meets REST principles, follows ROA architecture. In addition, it is recommended that the API utilizes hypermedia formats. Students must also design, implement and document a client application that uses that Web API functionality.
Therefore, the final deliverable should include two fully functional pieces of software: the Web API and the client application. The client application must be able to send HTTP requests to retrieve or modify resources in the server. The Web API must process those requests and generate adequate HTTP responses. The Web API must be able to store persistent data (i.e. must contain a functional database). Figure 1 shows the general architecture of the system.
'Figure 1. General system architecture
Project work implementation and documentation in short
Software of the project must be stored in a GIT repository. Students can choose among Github, Gitlab or Bitbucket. The Project Work Report must be written in a Wiki associated to the previous GIT repository. The repo structure as well as the Project Work Report section are provided by the course staff. More information in the GIT repo setup section.
GIT repo and Project Report template must be forked from the course Gitlab repo or Github repo
The documentation must be written in English.
The students are free to choose the development environment and programming language they prefer. However, the course staff only provide support for the programming languages and the web frameworks and libraries utilized during the exercises. Students who choose a different programming language or framework must configure the development environment and tools by themselves. Furthermore, they must deploy the Web API in a public server accessible by the course staff, with clear information on how to test their API.
The final grade of the course depends on the quality and correctness of both the Project Work Report and the software implementation. Both, the Web API and the client application must implement basic functionality in order to pass the course. Exercises and meeting with the course staff will have also some impact on the final grade. More detailed grading information can be found from the Evaluation criteria section of this documentation.
In addition, there is a minimum set of requirements that the projects must meet in order to pass this course. They are specified in section "Minimum requirements and constraints" of this document.
Important note concerning plagiarism: Course staff will not tolerate plagiarism. If the course staff detects plagiarism the students will automatically fail the course. When students include text, JSON/javascript fragments, code ... written by somebody else, they must indicate clearly the origin. It must be clear what is the student's own work and what is work created by others. The project work must contain mainly material generated by students themselves.
Students may select among two different workflows:
6 different deliverables: Students should deliver different sections of project work report as well as the software implementation in different deadlines. After deadline 1-4 students will have a meeting with the course staff. The staff will provide feedback to improve the project work. Students should present the final version of the project in a final meeting. Students need to attend to the exercise sessions.
1 final deliverable: Students must deliver both projects work report as well as the software implementation by the final deadline. Exercises must also be delivered by the final deadline. Students [[#meetings-with-the-staff|]meet twice with the course staff]: one in the middle of the course and one at the end of the course to present the final version of the project.
All your files and your Project Report must be uploaded to a GIT hosting service. We recommend either Github or Gitlab.
We have created a demo project that you must fork into your own account. We have the demo project in GitHub and GitLab. You can choose the best option for you.
For each section you need to complete the corresponding part of the Project Work Report in your Wiki Project. At the beginning of each page you have a short summary of what you should do during that this deliverable. After each section (heading) you have instructions on what to do in that section. Furthermore, you have detailed instructions on how are we going to evaluate that section. In the instructions, we use the following symbols:
Instructions. What to do in this section (heading)?
Detailed evaluation instructions
The pencil means that you need to write your own text in this section.
The computer means that for this section you do not need to write any text but implement software
You can edit the document using the Web editor of the online platform. In addition, you can edit it from the local version of the repository in your own computer. If you use the GIT repo you need to follow the Markdown syntax. You can find a small tutorial in the following link. Do not forget to {{commit}} and {{push}} after you have edited the document.
Some additional recommendations:
Figures and tables: When possible try to include a caption for each Figure and Table. All your local images should be stored in the uploads folder. If you use the web interface to edit the files, this will be done automatically.
Attachments: You can attach any kind of files to the report but it must be added as a link. You can use the uploads folder in order to save any file. You can make a link to that file in the documentation.
Report changes: It is highly recommended to write a short sentence explaining what you have changed in the report after each update. You can use either the commit message if you are editing locally or the Edit message or Commit message box if you are in the web editor.
Inserting code: If you need to insert code use always the markdown syntax highlighting, so the code is clearly different from the text.
It is important to note that the documentation required in this course exceeds the documentation that you normally needs to provide when implementing a Web API / Client in "real life" (e.g. in industry). However, we require that extensive documentation to be totally sure that you understand the main concepts taught during the course.
Students are free to choose the structure of your software repo. It is mandatory that the root of the repo includes the README.md file with clear instructions on how to setup your environment, populate the database, run your Web API and your client, run your test scripts and any other instructions that you consider relevant for us to test your Web API and client. If you are using python it is recommended that you use the file requirements.txt with all your libraries.In addition, you must include the meetings.md file in which you must write your meeting notes.
You can create a new repository for the client (for instance, if the client is developed in a non-web platform such as Python or Android). In this case, you must still keep the Project Work Report in Wiki of the original repository. Do not create the Project Work Report in two different repositories
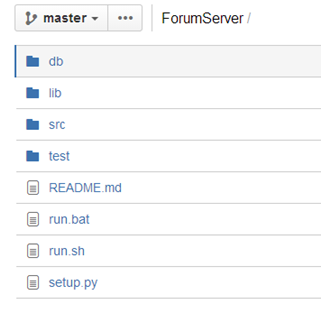
A recommended structure for your repo is shown in Figure 2. You will have more information on how to structure your project in the one section of the exercises:
src or app_name: source code of your application. Give an adequate name.
lib: external libraries
tests: sources and executables for the tests
db: sql dumps of the database (and .db files in case of sqlite)
scripts needed to run and setup the applications
README.md file with clear instructions on how to setup, run and test your Web API and your client.
'Figure 2. Folder structure inside the repository
When you commit a new software version to the repository it is mandatory that you write a short description of the changes that you have done in the code.
IMPORTANT: When you pull the final version of your code for a given deadline, tag this commit using the git tag command. The tag name should be the name of the deliverable: deliverable1, deliverable2, deliverable3...
Each group has to meet at least twice with the course staff to present the current status of the project work. During those meetings the assistants ask some questions to clarify certain concepts and give some recommendations.
In the case of groups who chose the final deadline option students should have one intermediate meeting and one final meeting to present the project results.
In the case of groups who chose intermediate deadlines students should have a meeting after deadline 1, 2, 3 and 4 and one final meeting to present the project results.
After each meeting students should write meeting notes and upload them to their GIT repo. The meeting notes must include a summary of what were discussed during the meeting and a set of action points agreed with the assistant
The time reserved for each meeting is ~30 minutes. Instructions to book a meeting will be announced later, but it will done very likely through Moodle.
There are 4 exercise materials. In those exercises, we present to the students some software tools, frameworks and libraries that are going to be useful for their project work. Exercises will contribute 16% of the course grade. You only receive points for exercises that have passed the automatic tests successfully.
Attendance to the exercises (except for those taking the final deliverable option) is mandatory. Students will have a grade penalization if they do not attend to the exercises. If a student has a justified reason and cannot attend to an exercise session they must inform the course staff beforehand. Exercises must be delivered before the deadline announced once the exercise is published.
All students need to deliver the exercises finished in Lovelace. However, we accept (and encourage) collaborative work between group members.
Exercises topics are:
Exercise 0: Project Work Presentation. Introduction to GIT.
Students can use any programming language both for the RESTful API and for the client application. BUT:
We give support only for the languages and frameworks provided in the exercises.
If students choose a different language or platform for the server they NEED TO SET UP A SERVER SO WE CAN TEST THEIR RESTful API. For the client, students should present a demo during a meeting to any of the course staff.
The minimum requirements to pass the course are:
The project report with all required sections
A working version of the Web API and the client application.
Design and implement at least 5 resources. You can design and implement more resources if you want (better grade). You can even not implement all the resources you have in your design (minimum is 5).
Each HTTP method (GET,PUT/PATCH, POST and DELETE) must be used at least twice in the uniform interface (PATCH is not mandatory). This does not mean that all the methods GET/PUT/POST/DELETE must be used in one single resource.
The RESTful API must be documented using any of the tools presented in Exercise 2 and 3 (e.g. Apiary, RAML, OpenAPI)
Students must provide software to test:
The database models(unit testing)
The RESTful API (functional testing)
We recommend to use Hypermedia format (e.g. HAL, Siren, UBER, Collection+Json) for the resource representations. We also accept the popular CRUD approach (that is using plain json or XML as resource representation). Still Connectedness is a ROA requirement, hence it is needed that there are links or connections among resources.
Students who do not use hypermedia formats (e.g. HAL, UBER) will not be able to get full points in all the sections. In total they will lose 8 points (out of 100).
Implement a GUI or a command line tool. You can implement non-human driven clients also, but first you must explain your ideas to one member of the course staff.
If you use HTML, it is not allowed to generate the code dynamically in the server.
You must use Javascript asynchronous requests.
Use all the methods of the Uniform interface at least once.
The final grade of the course is mainly based in the quality of the project work. Other aspects, such as the performance in the lab exercises, active participation during the course (asking questions, using the chat and the forum...) and the meetings with the assistants are also taken into consideration. We emphasize quality vs quantity: that is, it is more important that you have a small API (small number of resources) which has a proper design following RESTful principles, with adequate documentation and tests that covers your whole application than implementing an application which contains a large amount of resources but badly documented and tested.
In general, groups who do all the exercises, agree a meeting with the assistant and CAREFULLY follow all the instructions for the project report, get a final grade of at least '3'. Usually, all members of a group get the same grade. However, if the course staff considers that the work performed by the students is not balanced (that is, one of the students has worked much more than other members of the group) the final grade could be different. Students fail the course automatically if plagiarism is detected in any of the deliverables.
When we assess the report, we take into consideration its quality and its conformance with the specifications provided in the project report. Evaluation criteria for each section is provided in the Project Work Report.
Table 1 summarizes how the course is evaluated. Table 2 shows which will be your final grade (0 to 5) based on the number of points you got during the course (out of 100).
Project Work Topic
Deadlines
Number of points (out of 100) [*]
RESTful API description
D1
7.5
Database design and implementation
D2
9
RESTful Web Service API design
D3
25
RESTful Web Service API implementation
D4
18
Client design and implementation
D5
15
Analysis and reflection
D6
4.5
Project management
-
5
Exercises
-
16
Table 1. Evaluation.
Point (out of 100)
Final Grade
< 51
0
51 - 60
1
61- 70
2
71 - 80
3
81 -90
4
> 90
5
Table 2. Final Grade.
The final grade is obtained by adding up the grade for each one of the topics. Students must get at least the 51 points out of 100 to pass the course. If you miss a deadline, you lose the corresponding points.
Each exercise (Exercise 1 to Exercise 4) will be evaluated from 0 to 4. We will consider the participation during the exercise session and the correctness of the exercise. A student cannot pass the course till Exercise 1, 2, 3 and 4 are delivered.
Extra work might increase your final grade. At maximum you can earn 15 points out of 100 by doing extra work. Extra work points count only if students meet the pass criteria (at least 60 points from table 1) .
We always recommend that you choose a project that might be useful for you in the future. Or at least, to implement a project related to some of your hobbies. For instance, in the past, we have had several groups of students interested in frisbee golf. We have had several projects related to this topic: from a system to track the score in a game to another system to store the position of different tracks and difficulty of each one of them. Other teams has implemented some software that would help in the management of their guilds: for instance to track the borrowed material to the guild members.
Here is a list of selected past projects. Please, note that many of those projects had very reduced functionality, but they were enough to complete the course.
Students can do some extra work to improve the final grade. Documentation related to the extra work must be included in the final version of the report. Before starting any extra work task, students should explain their plans to the course assistants, so they can evaluate if it can be considered as extra work. Extra work must be presented to the assistants when it is finished, so students must agree a meeting with them. Examples of tasks that can be considered as extra work are:
Implement the client application using the RESTful API of another student group.
Peer-review: You provide feedback to other student's API design.
Public presentation of student's work to other researchers/partners.
Implement two different RESTful APIs. The client application uses both APIs. Another option is that one RESTful API call each other.
Make use of existing RESTful APIs in your clients.
Do exhaustive unit testing.
Use RESTful advanced features: authentication, permission caching, transactions…
Support multiple formats in the entity response.
Implement a client application for a mobile device.
Implement two different versions of the database (relational / non relational)
Students should only consider the Extra Work when they have finalized the basic course requirements. That means, for example, that students should not consider authentication while designing the RESTful API.
FINAL DEADLINE FOR ALL STUDENTS TO DELIVER THE PROJECT WORK AND ALL THE EXERCISES IS 07.05.2019
In addition, if students opted for the intermediate deadlines option, they have five intermediate deadlines in addition to the final deadline. Before each deadline, the students must complete the corresponding sections of the project report and upload the code to the GIT repository. After each deadline, the course staff will meet the students and provide individual feedback, suggesting how the project work can be improved. Students must write some meeting minutes, upload it to the GIT repository and modify the project work according to this feedback. The modifications made during the course will be considered for the final grade. Extra work material (see "Extra work" section ) must be delivered with the final deliverable.
NOTE: Students will not receive feedback from deliverable 5. If a group considers that they need such feedback, they should contact the course assistants directly and agree a meeting with them.
Deadline schedule is as follows:
Deadline 0 :Topic registration using Moodle registration form (Topic registration) (26th Jan)
Deadline 1: RESTful API introduction (02.02.2020)
Deadline 2: Database design and implementation (16.02.2020)
Deadline 3: RESTful API Design (08.03.2020)
Deadline 4: RESTful API implementation (05.04.2020)
Deadline 5: Client design and implementation (26.04.2020)
Deadline 6 : Final Deliverable (07.05.2020). FOR ALL STUDENTS
Information contained in this document could change during the course. Any significant change to this document will be announced using Moodle and/or mail through Weboodi.
Contact us through the course mail: pwp-course@lists.oulu.fi
Use the course Mattermost channel. You should receive an invitation to join the channel during the first two weeks of the course if you have successfully registered to weboodi.
Drop to the teacher's (TS354) or assistant's (TS354, TS373) . It is advisable to agree a meeting in advance.
Anna palautetta
Kommentteja ohjeista?
?
API Blueprint is a description language for REST APIs. Its primary categories are resources and their related actions (i.e. HTTP methods). It uses a relatively simple syntax. The advantage of using API Blueprint is the wide array of tools available. For example Apiary has a lot of features (interactive documentation, mockup server, test generation etc.) that can be utilized if the API is described in API Blueprint.
Another widely used alteranative for API Blueprint is OpenAPI.
Addressability is one of the key REST principles. It means that in an API everything should be presented as resources with URIs so that every possible action can be given an address. On the flipside this also means that every single address should always result in the same resource being accessed, with the same parameters. From the perspective of addressability, query parameters are part of the address.
Ajax is a common web technique. It used to be known as AJAX, an acronym for Asynchronous Javascript And XML but with JSON largely replacing XML, it become just Ajax. Ajax is used in web pages to make requests to the server without a page reload being triggered. These requests are asynchronous - the page script doesn't stop to wait for the response. Instead a callback is set to handle the response when it is received. Ajax can be used to make a request with any HTTP method.
Kuvaus
Examples
Anonymous functions are usually used as in-place functions to define a callback. They are named such because they are defined just like functions, but don't have a name. In JavaScript function definition returns the function as an object so that it can e.g. passed as an argument to another function. Generally they are used as one-off callbacks when it makes the code more readable to have the function defined where the callback is needed rather than somewhere else. A typical example is the forEach method of arrays. It takes a callback as its arguments and calls that function for each of its members. One downside of anonymous functions is that they function is defined anew every time, and this can cause significant overhead if performed constantly.
Anonymous functions are also often seen in Ajax calls:
In this case the functions are stored into the settings object as callable attributes. When they are called, the code contained within the function is executed.
Kuvaus
Example
In Flask application context (app context for short) is an object that keeps tracks of application level data, e.g. configuration. You always need to have it when trying to manipulate the database etc. View functions will automatically have app context included, but if you want to manipulate the database or test functions from the interactive Python console, you need to obtain app context using a with statement.
Obtaining app context in the console from module app.py (where the application is contained within the app variable):
In[1]:fromappimportappIn[2]:withapp.app_context():...:#do things
Blueprint is a Flask feature, a way of grouping different parts of the web application in such a way that each part is registered as a blueprint with its own root URI. Typical example could be an admin blueprint for admin-related features, using the root URI /admin/. Inside a blueprint, are routes are defined relatively to this root, i.e. the route /users/ inside the admin blueprint would have the full route of /admin/users/.
Defines how data is processed in the application
Cross Origin Resource Sharing (CORS) is a relaxation mechanism for Same Origin Policy (SOP). Through CORS headers, servers can allow requests from external origins, what can be requested, and what headers can be included in those requests. If a server doesn't provide CORS headers, browsers will browsers will apply the SOP and refuse to make requests unless the origin is the same. Note that the primary purpose of CORS is to allow only certain trusted origins. Example scenario: a site with dubious script cannot just steal a user's API credentials from another site's cookies and make requests using them because the APIs CORS configuration doesn't allow requests from the site's origin. NOTE: this is not a mechanism to protect your API, it's to protect browser users from accessing your API unintentionally.
Callback is a function that is passed to another part of the program, usually as an argument, to be called when certain conditions are met. For instance in making Ajax requests, it's typical to register a callback for at least success and error situations. A typical feature of callbacks is that the function cannot decide its own parameters, and must instead make do with the arguments given by the part of the program that calls it. Callbacks are also called handlers. One-off callbacks are often defined as anonymous functions.
Piece of software that consumes or utilizes the functionality of a Web API. Some clients are controlled by humans, while others (e.g. crawlers, monitors, scripts, agents) have different degree of autonomy.
In databases, columns define the attributes of objects stored in a table. A column has a type, and can have additional properties such as being unique. If a row doesn't conform with the column types and other restrictions, it cannot be inserted into the table.
Kuvaus
Common keywords
In object relational mapping, column attributes are attributes in model classes that have been initialized as columns (e.g. in SQLAlchemy their initial value is obtained by initializing a Column). Each of these attributes corresponds to a column in the database table (that corresponds with the model class). A column attribute defines the column's type as well as additional properties (e.g. primary key).
These are the most commonly used keyword attributes to SQLALchemy's Column:
default - the default value that is used when no value for the column is provided (must match column type)
nullable - does the column accept NULL as value (i.e. no value) (boolean)
primary_key - marks this column as the PK (boolean)
unique - all values in the column must be unique (boolean)
Connectedness is a REST principle particularly related to hypermedia APIs. It states that there for each resource in the API, there must exist a path from every other resource to get there by following hypermedia links. Connectedness is easiest to analyze by creating an API state diagram.
Kuvaus
Example
A hypermedia control is an attribute in a resource representation that describes a possible action to the client. It can be a link to follow, or an action that manipulates the resource in some way. Regardless of the used hypermedia format, controls include at least the URI to use when performing the action. In Mason controls also include the HTTP method to use (if it's not GET), and can also include a schema that describes what's considered valid for the request body.
In Mason controls are attached to the "@controls" attribute which can be part of the top-level resource, or part of an item in an array. Here's the delete control for an artist resource in the MusicMeta API example:
{"@controls":{"mumeta:delete":{"href":"/api/artists/dream theater/""title":"Delete this artist""method":"DELETE"}}}
Document Object Model (DOM) is an interface through which Javascript code can interact with the HTML document. It's a tree structure that follows the HTML's hierarchy, and each HTML tag has its own node. Through DOM manipulation, Javascript code can insert new HTML into anywhere, modify its contents or remove it. Any modifications to the DOM are updated into the web page in real time. Do note that since this is a rendering operation, it's very likely one of the most costly operations your code can do. Therefore changing the entire contents of an element at once is better than changing it e.g. one line at a time.
Database schema is the "blueprint" of the database. It defines what tables are contained in the database, and what columns are in each table, and what additional attributes they have. A database's schema can be dumped into an SQL file, and a database can also be created from a schema file. When using object relational mapping (ORM), the schema is constructed from model classes.
In HTML element refers to a single tag - most of the time including a closing tag and everything in between. The element's properties are defined by the tag, and any of the properties can be used to select that element from the document object model (DOM). Elements can contain other elements, which forms the HTML document's hierarchy.
For APIs entry point is the "landing page" of the API. It's typically in the API root of the URL hierarchy and contains logical first steps for a client to take when interacting with the API. This means it typically has one or more hypermedia controls which usually point to relevant collections in the API or search functions.
In software testing, a fixture is a component that satisfies the preconditions required by tests. In web application testing the most common role for fixtures is to initialize the database into a state that makes testing possible. This generally involves creating a fresh database, and possibly populating it with some data. In this course fixtures are implemented using pytest's fixture architecture.
This term contains basic instructions about setting up and running Flask applications. See the term tabs "Creating DB" and "Starting the App". For all instructions to work you need to be in the folder that contains your app.
Before the first run you need to create the database:
your/app/folder$ ipython
[1]: from yourapp import db
[2]: db.create_all()
In Linux:
your/app/folder$ export FLASK_APP=yourapp.py
your/app/folder$ export FLASK_ENV=development
flask run
In Windows:
C:\your\app\folder> set FLASK_APP=yourapp.py
C:\your\app\folder> set FLASK_ENV=development
flask run
In database terminology, foreign key means a column that has its value range determined by the values of a column in another table. They are used to create relationships between tables. The foreign key column in the target table must be unique.
For most hypermedia types, there exists a generic client. This is a client program that constructs a navigatable user interface based on hypermedia controls in the API, and can usually also generate data input forms. The ability to use such clients for testing and prototyping is one of the big advantages of hypermedia.
HTTP method is the "type" of an HTTP request, indicating what kind of an action the sender is intending to do. In web applications by far the most common method is GET which is used for retrieving data (i.e. HTML pages) from the server. The other method used in web applications is POST, used in submitting forms. However, in REST API use cases, PUT and DELETE methods are also commonly used to modify and delete data.
HTTP request is the entirety of the requets made by a client to a server using the HTTP protocol. It includes the request URL, request method (GET, POST etc.), headers and request body. In Python web frameworks the HTTP request is typically turned into a request object.
Headers are additional information fields included in HTTP requests and responses. Typical examples of headers are content-type and content-length which inform the receiver how the content should be interpreted, and how long it should be. In Flask headers are contained in the request.headers attribute that works like a dictionary.
Host part is the part of URL that indicates the server's address. For example, lovelace.oulu.fi is the host part. This part determines where (i.e. which IP address) in the world wide web the request is sent.
In API terminology hypermedia means additional information that is added on top of raw data in resource representations. It's derived from hypertext - the stuff that makes the world wide web tick. The purpose of the added hypermedia is to inform the client about actions that are available in relation to the resource they requested. When this information is conveyed in the representations sent by the API, the client doesn't need to know how to perform these actions beforehand - it only needs to parse them from the response.
An idempotent operation is an operation that, if applied multiple times with the same parameters, always has the same result regardless of how many times it's applied. If used properly, PUT is an idempotent operation: no matter how many times you replace the contents of a resource it will have the same contents as it would have if only one request had been made. On the other hand POST is usually not idempotent because it attempts to create a new resource with every request.
Instance folder is a Flask feature. It is intended for storing files that are needed when running the Flask application, but should not be in the project's code repository. Primary example of this is the prodcution configuration file which differs from installation to installation, and generally should remain unchanged when the application code is updated from the repository. The instance path can be found from the application context: app.instance_path. Flask has a reasonable default for it, but it can also be set manually when calling Flask constuctor by adding the instance_path keyword argument. The path should be written as absolute in this case.
Kuvaus
Serializing / Parsing
JavaScript Object Notation (JSON) is a popular document format in web development. It's a serialized representation of a data structure. Although the representation syntax originates from JavaScript, It's almost identical to Python dictionaries and lists in formatting and structure. A JSON document conists of key-value pairs (similar to Python dictionaries) and arrays (similar to Python lists). It's often used in APIs, and also in AJAX calls on web sites.
JSON is extremely simple to write and read in Python using the json module.
JSON schema is a JSON document that defines the validity criteria for JSON documents that fall under the schema. It defines the type of the root object, and types as well as additional constraints for attributes, and which attributes are required. JSON schemas serve two purposes in this course: clients can use them to generate requests to create/modify resources, and they can also be used on the API end to validate incoming requests.
In hypertext and hypermedia context, link relation is a semantic "tag" that indicates the link's purpose. Machine clients can use link relations to determine what to do with a link or how to present it to a human user. Link relations should always have explicitly defined meaning, and the use of standardized link relations is recommended wherever possible. APIs must provide definitions for all custom link relations they use.
MIME type is a standard used for indicating the type of a document.In web development context it is placed in the Content-Type header. Browsers and servers the MIME type to determine how to process the request/response content. On this course the MIME type is in most cases application/json.
Database migration is a process where an existing database is updated with a new database schema. This is done in a way that does not lose data. Some changes can be migrated automatically. These include creation of new tables, removal of columns and adding nullable columns. Other changes often require a migration script that does the change in multiple steps so that old data can be transformed to fit the new schema. E.g. adding a non-nullable column usually involves adding it first as nullable, then using a piece of code to determine values for each row, and finally setting the column to non-nullable.
In ORM terminology, a model class is a program level class that represents a database table. Instances of the class represent rows in the table. Creation and modification operations are performed using the class and instances. Model classes typically share a common parent (e.g. db.Model) and table columns are defined as class attributes with special constuctors (e.g. db.Column).
Here's a simple model class (along with imports required to create it)
In API terminology, namespace is a prefix for names used by the API that makes them unique. The namespace should be a URI, but it doesn't have to be a real address. However, usually it is convenient to place a document that described the names within the namespace into the namespace URI. For our purposes, namespace contains the custom link relations used by the API.
In Mason namespace should be indicated in each response using the "@namespaces" attribute. For example you can see this namespace definition in all MusicMeta API examples:
Object relational mapping is a way of abstracting database use. Database tables are mapped to programming language classes. These are usually called models. A model class declaration defines the table's structure. When rows from the database table are fetched, they are represented as instances of the model class with columns as attributes. Likewise new rows are created by making new instances of the model class and committing them to the database. This course uses SQLAlchemy's ORM engine.
In database terminology primary key refers to the column in a table that's intended to be the primary way of identifying rows. Each table must have exactly one, and it needs to be unique. This is usually some kind of a unique identifier associated with objects presented by the table, or if such an identifier doesn't exist simply a running ID number (which is incremented automatically).
Profile is metadata about a resource. It's a document intended for client developers. A profile gives meaning to each word used in the resource representation be it link relation or data attribute (also known as semantic descriptors). With the help of profiles, client developers can teach machine clients to understand resource representations sent by the API. Note that profiles are not part of the API and are usually served as static HTML documents. Resource representations should always contain a link to their profile.
In database terminology, query is a command sent to the database that can fetch or alter data in the database. Queries use written with a script-like language. Most common is the structured query language (SQL). In object relational mapping, queries are abstracted behind Python method calls.
Kuvaus
Example
Query parameters are additional parameters that are included in a URL. You can often see these in web searches. They are the primary mechanism of passing arbitrary parameters with an HTTP request. They are separated from the actual address by ?. Each parameter is written as a key=value pair, and they are separated from each other by &. In Flask applications they can be found from request.args which works like a dictionary.
Regular expressions are used in computing to define matching patterns for strings. In this course they are primarily used in validation of route variables, and in JSON schemas. Typical features of regular expressions are that they look like a string of garbage letters and get easily out of hand if you need to match something complex. They are also widely used in Lovelace text field exercises to match correct (and incorrect) answers.
Here's a regular expression that matches valid ISO dates (and some invalid ones)
"^[0-9]{4}-[01][0-9]-[0-3][0-9]$"
Where:
^ marks the start of string
$ marks the end of string (meaning there must not be anything else in the string)
square braces define a group of characters to match
In this course request referes to HTTP request. It's a request sent by a client to an HTTP server. It consists of the requested URL which identifies the resource the client wants to access, a method describing what it wants to do with the resource. Requests also include headers which provide further context information, and possihby a request body that can contain e.g. a file to upload.
Kuvaus
Accessing
In an HTTP request, the request body is the actual content of the request. For example when uploading a file, the file's contents would be contained within the request body. When working with APIs, request body usually contains a JSON document. Request body is mostly used with POST, PUT and PATCH requests.
In Flask the request body is accessed differently depending on its content type.
If the content type is JSON, request body is accessible through request.json as a dictionary
If the content type is form, request body is accessible through request.form
If the content type is some other type of text, it will be in request.data
Kuvaus
Getting data
Request object is related to web development frameworks. It's a programming language object representation of the HTTP request made to the server. It has attributes that contain all the information contained within the request, e.g. method, url, headers, request body. In Flask the object can be imported from Flask to make it globally available.
The request has several different attributes that contain data that might be needed in the view function.
request.json - request body JSON parsed into a Python dictionary
request.args - a dictionary-like object containing query parameters
request.form - a dictionary-like object containing HTML form data
request.headers - a dictionary-like object containing request headers
request.files - files uploaded with the request
request.data - the request body as a string (should never be used for JSON requests in this course!)
in RESTful API terminology, a resource is anything that is interesting enough that a client might want to access it. A resource is a representation of data that is stored in the API. While they usually represent data from the database tables it is important to understand that they do not have a one-to-one mapping to database tables. A resource can combine data from multiple tables, and there can be multiple representations of a single table. Also things like searches are seen as resources (it does, after all, return a filtered representation of data).
Resource classes are introduced in Flask-RESTful for implementing resources. They are inherited from flask_restful.Resource. A resource class has a view-like method for each HTTP method supported by the resource (method names are written in lowercase). Resources are routed through api.add_resource which routes all of the methods to the same URI (in accordance to REST principles). As a consequence, all methods must also have the same parameters.
In this course we use the term representation to emphasize that a resource is, in fact, a representation of something stored in the API server. In particular you can consider representation to mean the response sent by the API when it receives a GET request. This representation contains not only data but also hypermedia controls which describe the actions available to the client.
In this course response refers to HTTP response, the response given by an HTTP server when a request is made to it. Reponses are made of a status code, headers and (optionally) response body. Status code describes the result of the transaction (success, error, something else). Headers provide context information, and response body contains the document (e.g. HTML document) returned by the server.
Response body is the part of HTTP response that contains the actual data sent by the server. The body will be either text or binary, and this information with additional type instructions (e.g. JSON) are defined by the response's Content-type header. Only GET requests are expected to return a response body on a successful request.
Response object is the client side counterpart of request object. It is mainly used in testing: the Flask test client returns a response object when it makes a "request" to the server. The response object has various attributes that represent different parts of an actual HTTP response. Most important are usually status_code and data.
In database terminology, rollback is the cancellation of a database transaction by returning the database to a previous (stable) state. Rollbacks are generally needed if a transaction puts the database in an error state. On this course rollbacks are generally used in testing after deliberately causing errors.
Kuvaus
Routing in Flask
Reverse routing
Flask-RESTful routing
URL routing in web frameworks is the process in which the framework transforms the URL from an HTTP request into a Python function call. When routing, a URL is matched against a sequence of URL templates defined by the web application. The request is routed to the function registered for the first matching URL template. Any variables defined in the template are passed to the function as parameters.
In Flask routes are defined using the app.route decorator in combination with a view function. The decorator takes the route's URL temoplate as its argument. Variables in the URL template match with the function's parameters. E.g.
Reverse routing is used when you want to generate a URL based on routes registered to the application. This is extremely useful for managing routes without breaking code - when a route is changed, all URLs will automatically match the new route if they've been generated with reverse routing. Reverse routing is done with the url_for function, which can be imported from Flask. It takes endpoint name as its first argument. It can be set with the endpoint keyword argument, and it defaults to the view function's name. The rest of the arguments must match the URL template variables.
With Flask-RESTful routing is done for resource classes using the Api object's add_resource method. This routes all different HTTP methods to their corresponding resource class methods.
Reverse routing can be done in two ways: using the method described in the "Reverse routing" tab (default endpoint name is the class name) or using Api object's url_for method which takes the resource class as its first argument and otherwise works identically.
api.url_for(SensorItem,sensor=handle)
This approach is clearer for single file applications but can cause issues with circular imports if you split resources into multiple modules.
In relational database terminology, row refers to a single member of table, i.e. one object with properties that are defined by the table's columns. Rows must be uniquely identifiable by at least one column (the table's primary key).
SQL (structured query language) is a family of languages that are used for interacting with databases. Queries typically involve selecting a range of data from one or more tables, and defining an operation to perform to it (such as retrieve the contents).
Serialization is a common term in computer science. It's a process through which data structures from a program are turned into a format that can be saved on the hard drive or sent over the network. Serialization is a reversible process - it should be possible to restore the data structure from the representation. A very common serialization method in web development is JSON.
In web applications static content refers to content that is served from static files in the web server's hard drive (or in bigger installations from a separate media server). This includes images as well as javascript files. Also HTML files that are not generated from templates are static content.
In database terminology, a table is a collection of similar items. The attributes of those items are defined by the table's columns that are declared when the table is created. Each item in a table is contained in a row.
In software testing, test setup is a procedure that is undertaken before each test case. It prepares preconditions for the test. On this course this is done with pytest's fixtures.
In software testing, test teardown is a process that is undertaken after each test case. Generally this involves clearing up the database (e.g. dropping all tables) and closing file descriptors, socket connections etc. On this course pytest fixtures are used for this purpose.
Universal resource identifier (URI) is basically what the name says: it's a string that unambiguously identifies a resource, thereby making it addressable. In APIs everything that is interesting enough is given its own URI. URLs are URIs that specify the exact location where to find the resource which means including protocol (http) and server part (e.g. lovelace.oulu.fi) in addition to the part that identifies the resource within the server (e.g. /ohjelmoitava-web/programmable-web-project-spring-2019).
Kuvaus
Type converters
Custom converters
URL template defines a range of possible URLs that all lead to the same view function by defining variables. While it's possible for these variables to take arbitrary values, they are more commonly used to select one object from a group of similar objects, i.e. one user's profile from all the user profiles in the web service (in Flask: /profile/<username>. If a matching object doesn't exist, the default response would be 404 Not Found. When using a web framework, variables in the URL template are usually passed to the corresponding view function as arguments.
It's also possible to add type conversion to URL variables. This automatically converts the view function parameters into the correct type, and returns 404 if the conversion cannot be done. Type validating and convering numbers is quite simple:
Floats work the same way. Take care though: the float type specifier only accepts numbers that have a decimal point! This is not a valid URL: "/do-something-with-float/1/"! It would need to be written as "/do-something-with-float/1.0/"
You can also implement custom converters. These are classes that have two methods: to_python and to_url - the first one being responsible for conversion when calling the view function, and the second one for generating URLs with reverse routing. You can find an example by following the link below.
Uniform interface is a REST principle which states that all HTTP methods, which are the verbs of the API, should always behave in the same standardized way. In summary:
GET - should return a representation of the resource; does not modify anything
POST - should create a new instance that belongs to the target collection
PUT - should replace the target resource with a new representation (usually only if it exists)
DELETE - should delete the target resource
PATCH - should describe a change to the resource
In database terminology, unique constraint is a what ensures the uniqueness of each row in a table. Primary key automatically creates a unique constraint, as do unique columns. A unique constraint can also be a combination of columns so that each combination of values between these columns is unique. For example, page numbers by themselves are hardly unique as each book has a first page, but a combination of book and page number is unique - you can only have one first page in a book.
Kuvaus
Registering
View functions are Python functions (or methods) that are used for serving HTTP requests. In web applications that often means rendering a view (i.e. a web page). View functions are invoked from URLs by routing. A view function always has application context.
View functions are registered using the app.route decorator. A view function's parameters must match the variables in the URL template given to the decorator:
A Python virtual environment (virtualenv, venv) is a system for managing packages separately from the operating system's main Python installation. They help project dependency management in multiple ways. First of all, you can install specific versions of packages per project. Second, you can easily get a list of requirements for your project without any extra packages. Third, they can placed in directories owned by non-admin users so that those users can install the packages they need without admin privileges. The venv module which is in charge of creating virtual environments comes with newer versions of Python.
Virtual environments are created using the venv module. It can be invoked through the Python interpreter from the command line:
python -m venv /path/to/the/virtualenv
in most Linux and OS X systems the command to use is python3 instead of python.
To use the virtual environment's Python packages, it must be activated. In Linux and OS X this is done by
source /path/to/the/virtualenv/bin/activate
and in Windows:
C:\path\to\the\virtualenv\Scriptrs\activate
Upon activation the virtual environment's name will be placed at the beginning of the command prompt. E.g.
(pwp-env) user@computer:~/$
In all operating systems you can deactivate the virtual environment by giving the deactivate command.
Interface, implemented using web technologies, that exposes a functionality in a remote machine (server). By extension Web API is the exposed functionality itself.