Ryhmien muodostaminen Lovelacessa
Ryhmien tarkoitus
Lovelace käyttää ryhmiä pääasiassa kahteen tarkoitukseen. Näistä ensimmäinen on tehtävien vastausten ja tulosten jakaminen jäsenten välillä. Jos tehtävä tukee ryhmäsuoritusta ja yksi ryhmän jäsen vastaa siihen, vastaus tulee näkyviin myös muille ryhmän jäsenille. Vastaavasti lopputulos kuten oikein/väärin ja tehtävästä saadut pisteet kopioituvat kaikille ryhmän jäsenille. Ryhmien toinen käyttötarkoitus liittyy varauskalentereihin. Jos yksi ryhmän jäsen varaa ajan kalenterista, kaikki ryhmän jäsenet merkitään samaan varaukseen.
Ohjeet
Lovelacessa voi muodostaa ryhmän oikean yläkulman valikosta valitsemalla "Ryhmän tiedot".

Ryhmä muodostetaan siten, että yksi jäsen luo ryhmän ja kutsuu sitten muut jäsenet. Vain yhden jäsenen tulisi siis luoda ryhmä. Toiseen ryhmään kuuluvia jäseniä ei voi nimittäin kutsua. Nykyisellään järjestelmän tosin pitäisi automaattisesti purkaa yhden jäsenen "ryhmät", jos niiden ainoa jäsen hyväksyy kutsun toiseen ryhmään. Kaikkien kutsuttavien tulee olla ilmoittautuneena samassa kurssitilassa.
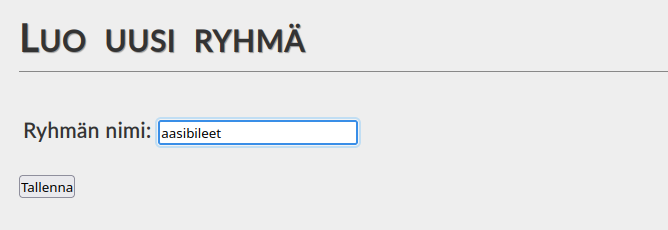
Ryhmä luodaan yksinkertaisesti valitsemalla sille nimi ja painamalla "Tallenna".

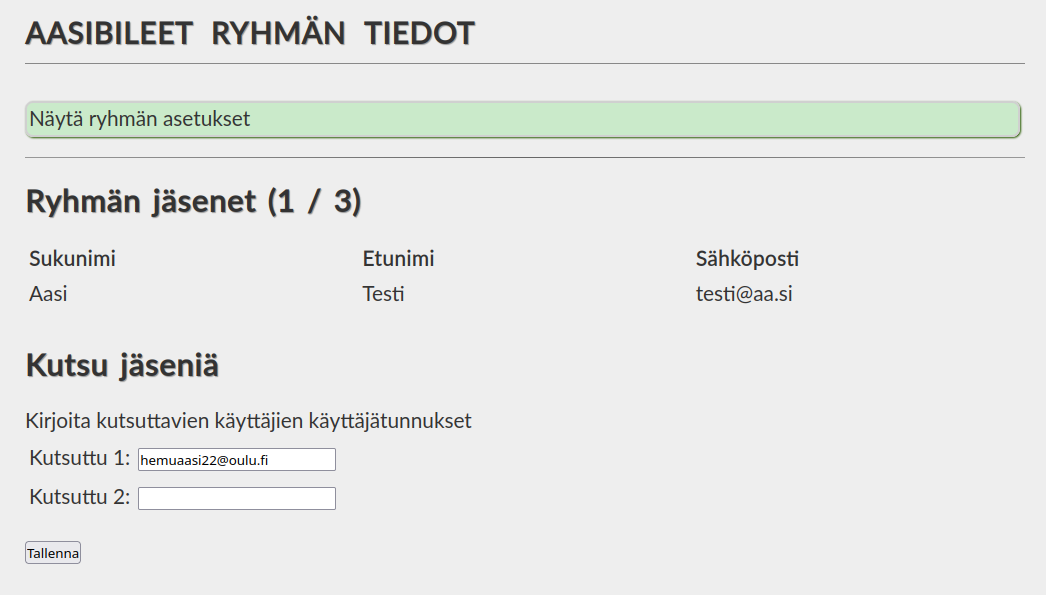
Kun olet luonut ryhmän, voit lähettää korkeintaan N-1 kutsua, jossa N on kurssille asetettu ryhmän maksimikoko. Kutsun lähettämistä varten tarvitset tietoosi kutsuttavan käyttäjän käyttäjätunnuksen. Jos olette käyttäneet yliopiston kirjautumisjärjestelmää, tämä tunnus on sama kuin yliopiston käyttäjätunnus (eli tyypillisesti yhdistelmä etu- ja sukunimeä jonka perässä on aloitusvuoden kaksi viimeistä numeroa), jonka perään on liitettty
@oulu.fi. Eli esimerkkikuvissa näkyvän aasin käyttäjättunnus olisi testaasi22@oulu.fi. 
Kun kutsut on lähetetty, muut jäsenet voivat käydä hyväksymässä kutsut menemällä omalla tunnuksellaan "Ryhmän tiedot" sivulle.
Jos ryhmän luonnissa on ongelmia, ota yhteyttä kurssin henkilökuntaan, joka voi luoda ryhmän opettajatilan kautta. Ilmoita viestissä kaikkien ryhmään tulevien jäsenten nimet ja käyttäjätunnukset.