In database terminology primary key refers to the column in a table that's intended to be the primary way of identifying rows. Each table must have exactly one, and it needs to be unique. This is usually some kind of a unique identifier associated with objects presented by the table, or if such an identifier doesn't exist simply a running ID number (which is incremented automatically).
Learning Outcomes and Material
This exercise discusses two sides of making an API available: documenting it for other developers, and deploying it to be accessed via the internet.
This first part of this exercise introduces OpenAPI for writing API documentation and a quick glance at tools related to it. You will learn the basic structure of an OpenAPI document, and how to offer API documentation directly from Flask. Documentation will be made for the same version of SensorHub API that was used in the previous testing material.
Start from the last branch.
Introduction Lecture
The introduction lecture will only be in-person on the campus. As the contents of this exercise have changed, existing recordings from previous years are no longer applicable.
API Documentation with OpenAPI
Your API is only as good as its documentation. It hardly matters how neat and useful your API is if no one knows how to use it. This is true whether it is a public API, or between different services in a closed architecture. Good API documentation shows all requests that are possible; what parameters, headers, and data are needed to make those requests; and what kinds of responses can be expected. Examples and semantics should be provided for everything.
API documentation is generally done with description languages that are supported by tools for generating the documentation. In this exercise we will be looking into
OpenAPI
and Swagger
- an API description format and the toolset around it. These tools allow creating and maintaining API documentation in a structured way. Furthermore, various tools can be used to generate parts of the documentation automatically, and reuse schemas
in the documentation in the API implementation itself. All of these tools make it easier to maintain documentation as the distance between your code and your documentation becomes smaller.While there are a lot of fancy tools to generate documentation automatically, you first need a proper understanding of the API description format. Without understanding the format it is hard to evaluate when and how to use fancier tools. This material will focus on just that: understanding the OpenAPI specification and being able to write documentation with it.
This material uses OpenAPI version 3.0.4 because at the time of writing, Flasgger does not support the latest 3.1.x versions.
Preparation
There's a couple of pages that are useful to have open in your browser for this material. First there is the obvious OpenAPI specification. It is quite a hefty document and a little hard to get into at first. Nevertheless, after going through this material you should have a basic understanding of how to read it. The second page to keep handy is the Swagger editor where you can paste various examples to see how they are rendered. Also very useful when documenting your own project to ensure your documentation conforms to the OpenAPI specification.
On the Python side, there are a couple of modules that are needed. Primarily we want Flasgger which a Swagger toolkit for Flask. We also have some use for PyYaml. Perform these sorceries and you're all set:
pip install flasgger
pip install pyyaml
Very Short Introduction to YAML
At its core OpenAPI is a specification format that can be written in JSON or YAML. We are going to use
YAML
in the examples for two reasons: it's the format supported by Flasgger, but even more importantly it is much less "noisy" which makes it a whole lot more pleasant to edit. YAML is "a human-friendly data serialization language for all programming languages". It is quite similar to JSON but much like Python, it removes all the syntactic noise from curly braces by separating blocks by indentation. It also strips the need for quotation marks for strings, and most importantly does not give two hoots about extra commas at the last line of object or array. To give a short example, here is a comparison of the same sensor serialized first in JSON{
"name": "test-sensor-1",
"model": "uo-test-sensor",
"location": {
"name": "test-site-a",
"description": "some random university hallway"
}
}
And the same in YAML:
name: test-sensor-1
model: uo-test-sensor
location:
  name: test-site-a
  description: some random university hallway
The only other thing you really need to know is that items that are in an array together are prefixed with a dash (-) instead of key. A quick example of a list of sensors serialized in JSON:
{
    "items": [
        {
            "name": "test-sensor-1",
            "model": "uo-test-sensor",
            "location": "test-site-a"
        },
        {
            "name": "test-sensor-2",
            "model": "uo-test-sensor",
            "location": null
        }
    ]
}
And again the same in YAML:
items:
- name: test-sensor-1
  model: uo-test-sensor
  location: test-site-a
- name: test-sensor-2
  model: uo-test-sensor
  location: null
Note the lack of differentiation between string values and the null value. In here null is simply a reserved keyword that is converted automatically in parsing. Numbers work similarly. If you absolutely need the string "null" instead, then you can add quotes, writing
location: 'null' instead. Finally there are two ways to write longer pieces of text: literal and folded style. Examples below:multiline: |
This is a very long description
that spans a whole two lines
folded: >
This is another long description
that will be in a single line
There are a few more detail to YAML but they will not be relevant for this exercise. Feel free to look them up from the specification.
OpenAPI Structure
An OpenAPI document is a rather massively nested structure. In order to get a better grasp of the structure we will start from the top, the OpenAPI Object. This is the document's root level object, and contains a total of 8 possible fields, out of which 3 are required.
- openapi: Required. This is the version of the OpenAPI specification used by the document. For our purposes it will be
"3.0.4" - info: This will contain metadata about the API. Introduced later in this section
- servers: This is an array listing servers for the API. This can list relative URLs, so we're just going to put the URL
"/api"as the only item here, and call it done. - paths: Basically the main portion of the document, this will contain documentation for every single path (URI) available in the API. We will talk about it more in this section.
- components: Another important portion. Contains various reusable components that can be referenced from other parts of the document.
- security: Array of possible security mechanisms that can be used in the API. Not discussed in this material.
- tags: Array of tags that can be used to categorize operations. Not discussed in this material.
- externalDocs: Can contain a link to external documentation. Not discussed in this section.
The next sections will dive into info, paths and components in more detail. Presented below is the absolute minimum of what must be in OpenAPI document. Absolutely useless as a document, but should give you an idea of the very basics.
openapi: 3.0.4
info:
  title: Absolute Minimal Document
  version: 1.0.0
paths:
  /:
    get:
      responses:
        '200':
          description: An empty root page
Info Object
The info object contains some basic information about your API. This information will be displayed at the top of the documentation. It should give the reader relevant basic information about what the API is for, and - especially for public APIs - terms of service and license information. The fields are quite self-descriptive in the OpenAPI specification, but we've listed them below too.
- title: The title of the API. Required.
- version: The versio number of this API. Required. Extremely important when providing multiple versions of the same API (often needed to give clients a transition period when the API changes).
- description: A longer description of the API. CommonMark can be used in the description. It is most likely that the description should use literal or folded style.
- termsOfService: A URL that points to the terms of service document for the API. Obviously important for public APIs, but this is not a law course so we will not bother with TOS.
- contact: Contact information for the API. This has to contain an object with up to three fields: name, url, and email.
- license: License information for the API data. The value for this field is an object with two fields: license name and url. Again, obviously important, but promptly ignored within this course.
Below is an example of a completely filled info object.
info:
  title: Sensorhub Example
  version: 0.0.1
  description: |
    This is an API example used in the Programmable Web Project course.
    It stores data about sensors and where they have been deployed.
  termsOfService: http://totally.not.placehold.er/
  contact:
    url: http://totally.not.placehold.er/
    email: pwp-course@lists.oulu.fi
    name: PWP Staff List
  license:
    name: Apache 2.0
    url: https://www.apache.org/licenses/LICENSE-2.0.html
Components Object
The components object is a very handy feature in the
OpenAPI
specification that can drastically reduce the amount of work needed when maintaining documentation. It is essentially a storage for resuable objects that can be referenced from other parts of the documentation (the paths component in particular). Anything that appears more than once in the documentation should be placed here. That way you do not need to update multiple copies of the same thing when making changes to the API.This object has various fields that categorise the components by their object type. First we will go through all the fields. After that we're going to introduce the component types that are most likely to end up here in their own sub sections.
- schemas: This field is for storing reusable schemas. Possibly the most important reusable component type as schemas not only come up often, but are also rather chonky.
- responses: This is for storing responses. Useful if multiple routes in the API return identical responses but we are mostly trying to avoid that. We will talk more about responses in the Paths Object section.
- parameters: This stores parameters that can be present in URIs,headers,cookies, andqueries. Due to the hierarchy of URIs, these will be repeated a lot, and make a good candidate to be placed in the Components Object.
- examples: Examples that can be shown in the API documentation for both requestandresponsebodies.
- requestBodies: Essentially a couple of levels up from example, stores the entire request body instead. This can be useful as POST and PUT requests often have similar bodies.
- headers: Stores headers. If there are headers that are reused as-is, they should be placed here.
- securitySchemes: Reusable security scheme components. If the API has authentication, it is quite likely repeated often, and therefore is best placed here.
- links: Stores links that can point out known relationships and travelsal. We'll talk more about links when discussing hypermedia.
- callBacks: Stores out-of-band callbacks that can be made related to the parent. Not discussed here.
Out of these we are going to dive into details about schemas, parameters, and requestBodies next.
Schema Object
The schemas field in components will be the new home for all of our schemas. The structure is rather simple: it's just a mapping of schema name to schema object. Schema objects are essentially
JSON schemas
, just written out in YAML
(that is, in our case - OpenAPI can be written in JSON too.) OpenAPI does adjust the definitions of some properites of JSON schema, as specified in the schema object documentation. Below is a simple example of how to write the sensor schema we used earlier into a reusable schema component in OpenAPI.
components:
  schemas:
    Sensor:
      type: object
      properties:
        model:
          description: Name of the sensor's model
          type: string
        name:
          description: Sensor's unique name
          type: string
      required:
      - name
      - model
Since we already wrote these schemas once as part of our
model classes
, there's little point in writing them manually again. With a couple of lines in the Python console you can output the results of your json_schema methods into yaml, which you can then copy-paste into your document:import yaml from sensorhub import Sensor print(yaml.dump(Sensor.json_schema()))
Parameter Object
Describing all of the URL variables in our
route
under the parameters field in components is usually a good idea. Even in a small API like the course project, at least the root level variables will be present in a lot of URIs. For instance the sensor variable is already present in at least three routes:/api/sensors/<sensor>/ /api/sensors/<sensor>/measurements/ /api/sensors/<sensor>/measurements/1/
For the sake of defining each thing in only one place, it seems very natural for parameters to be reusable components. Also, although we didn't talk about
query parameters
much, they can also be described here - useful if you have lots of resources that support filtering or sorting using similar queries. In OpenAPI a parameter is described through a few fields. - name: Obviously required. This is the parameter's name within the documentation. Not necessarily the same as the URI variable name in your code (which is just an implementation detail and not visible to clients).
- in: Required field. This field defines where the parameter is. For route variables this value should be "path". For query parameters it's "query". We won't cover the other options ("header" and "cookie") in this exercise.
- description: Optional description that explains what the parameter is. Should be provided, but less relevant for hypermedia APIs.
- required: This field indicates whether the parameter is required or not. For path parameters this must be present and set to true.
- deprecated: Should be set to true for parameters that are going to go out of use in future versions of the API. Should not be used with path parameters.
- schema: Can contain a schema that defines the type of the parameter.
Below is an example of the sensor path parameter:
components:
  parameters:
    sensor:
      description: Selected sensor's unique name
      in: path
      name: sensor
      required: true
      schema:
        type: string
As you can see it's quite a few lines just to describe one parameter. All the more reason to define it in one place only. If you look at the parameter specification it also lists quite a few ways to describe parameter style besides schema, but for our purposes schema will be sufficient.
Security Scheme Component
If your API uses authentication, it is quite likely that it is used for more than one resource. Therefore placing security schemes in the reusable components part seems like a smart thing to do. What exactly a security scheme should contain depends on its type. For API keys there are four fields to fill.
- type: Indicates the type. Required, and for API key it should be "apiKey"
- description: Just a short description, optional.
- name: Name of the header,query parameter, orcookiewhere the API key is expected to be.
- in: Defines where the API key should be presented, possible values are "header", "query", and "cookie".
A quick example.
components:
  securitySchemes:
    sensorhubKey:
      type: apiKey
      name: Sensorhub-Api-Key
      in: header
Paths Object
The paths object is the meat of your
OpenAPI
documentation. This object needs to document every single path (route
) in your API. All available methods also need to be documented with enough detail that a client can be implemented based on the documentation. This sounds like a lot of work, and it is, but it's also necessary. Luckily there are ways to reduce the work, but first let's take a look at how to do it completely manually to get an understand of what actually goes into these descriptions.By itself the paths object is just a mapping of path (route) to path object that describes it. So the keys in this object are just your paths, including any path parameters. Unlike Flask where these are marked with angle braces (e.g.
{sensor}). So, for instance, the very start of our paths object would be something like:paths:
/sensors/:
...
/sensors/{sensor}/:
...
Note that these paths are appended to whatever you put in the servers field in the root level servers attribute. Since we put
/api there, these paths in full would be the same as our routes: /api/sensors/ and /api/sensors/{sensor}/. Path Object
A single path is mostly a container for other objects, particularly: parameters and operations. As we discussed earlier, pulling the parameters from the
components object
is a good way to avoid typing the same documentation twice. The operations refer to each of the HTTP methods that are supported by this resource. Before moving on to operations, here is a quick example of referencing the sensor parameter we placed in components:paths:
/sensors/{sensor}/:
parameters:
- $ref: '#/components/parameters/sensor'
In short, a reference is made with
$ref key, using the referred object's address in the documentation as the value. When this is rendered, the contents from the referenced parameter are shown in the documentation.Operation Object
An operation object contains all the details of a single operation done to a resource. These match to the HTTP methods that are available for the resource. Operations can be roughly divided into two types: ones that return a response body (GET mostly) and ones that don't. Once again OpenAPI documentation for operations lists quite a few fields. We'll narrow the list down a bit.
- description: A description of what the operation does. While in REST it should be clear from the method being used, it's still nice to write a small summary.
- responses: This field is required, and contains a mapping of all the possible responses, including errors.
- security: This is an array of possible security schemes used for this operation. Note that only one of the listed measures needs to be satisfied. Therefore if you only have one way to authorize the operation, this array should have exactly one item. Ideall a reference to an existing security scheme.
- parameters: This field can have parameters that specific to one operation instead of the whole path. Mostly useful for GET methods that support filtering and/or sorting via query parameters.
- requestBody: This field shows what is expected from the request body. Very relevant for POST, PUT, and PATCH operations. As discussed earlier, this could potentially be something where you want to use references to reusable components.
The responses part is a mapping of status code into a description. Important thing to note is that the codes need to be quoted, as yaml doesn't support starting a name with a number (again, like Python). The contents of a response are discussed next.
Response Object
A response object is an actual representation of what kind of data is to be expected from the API. This also includes all error responses that can be received when the client makes an invalid request. At the very minimum a response object needs to provide a description. For error responses this might be sufficient as well. However for 200 responses the documentation generally also needs to provide at least one example of a response body. This goes into the content field. The content field itself is a mapping of media type to media type objects.
The media type defines the contents of the response through schema and/or example(s). This time we will show how to do that with examples. In our SensorHub API we can have two kinds of sensors returned from the sensor resource: sensors with a location, and without. For completeness' sake it would be best to show an example of both, in which case using the examples field is a good idea. The examples field is a mapping of example name to an example object that usually contains a description, and then finally value where the example itself is placed. Here is a full example all the way from document root to the examples in the sensor resource. It's showing two responses (200 and 404), and two different examples (deployed-sensor and stored-sensor).
paths:
  /sensors/{sensor}/:
    parameters:
    - $ref: '#/components/parameters/sensor'
get:
description: Get details of one sensor
responses:
'200':
description: Data of single sensor with extended location info
content:
application/json:
examples:
deployed-sensor:
description: A sensor that has been placed into a location
value:
name: test-sensor-1
model: uo-test-sensor
location:
name: test-site-a
latitude: 123.45
longitude: 123.45
altitude: 44.51
description: in some random university hallway
stored-sensor:
description: A sensor that lies in the storage, currently unused
value:
name: test-sensor-2
model: uo-test-sensor
location: null
'404':
description: The sensor was not found
Another example that shows using a single example, in the example field. In this case the example content is simply dumped as the field's value. This time the response body is an array, as denoted by the dashes.
paths:
  /sensors/:
    get:
      description: Get the list of managed sensors
      responses:
        '200':
          description: List of sensors with shortened location info
          content:
            application/json:
              example:
              - name: test-sensor-1
                model: uo-test-sensor
                location: test-site-a
              - name: test-sensor-2
                model: uo-test-sensor
                location: null
One final example shows how to include the Location header when documenting 201 responses. This time a headers field is added to the
operation object
while content is omitted (because 201 response is not supposed to have a body). paths:
/sensors/:
post:
description: Create a new sensor
responses:
'201':
description: The sensor was created successfully
headers:
Location:
description: URI of the new sensor
schema:
type: string
Here the key in the headers mapping must be identical to the actual header name in the response.
Request Body Object
In POST, PUT, and PATCH operations it's usually helpful to provide an example or schema for what is expected from the request body. Much like a response object, a request body is also made of the description and content fields. As stated earlier, it might be better to put these into components from the start, but we're showing them embedded into the paths themselves. bAs such there isn't much new to show here as the content field should contain a similar media type object as the respective field in responses. Our example here shows the POST method for sensors collection, with both schema (referenced) and an example:
paths:
  /sensors/:
    post:
      description: Create a new sensor
      requestBody:
        description: JSON document that contains basic data for a new sensor
        content:
          application/json:
            schema:
              $ref: '#/components/schemas/Sensor'
            example:
              name: new-test-sensor-1
              model: uo-test-sensor-plus
Full Example
You can download the full SensorHub API example below. Feed it to the Swagger editor to see how it renders. In the next section we'll go through how to have it rendered directly from the API server.
Swagger with Flasgger
Flasgger is a toolkit that brings Swagger to Flask. At the very minimum it can be used for serving the API documentation from the server, with the same rendering that is used in the Swagger editor. It can also do other fancy things, some of which we'll look into, and some will be left to the reader's curiosity.
Basic Setup
Git branch: ex3-01-single-yml
When setting up documentation the source YAML files should be put into their own folder. As the first step, let's create a folder called doc, under the folder that contains your app (or the api.py file if you are using a proper project structure). Download the example from above and place it into the doc folder.
In order to enable Flasgger, it needs to be imported, configured, and initialized. Very much like Flask-SQLAlchemy and Flask-Caching earlier. This whole process is shown in the code snippet below.
from flasgger import Swagger, swag_from

app = Flask(__name__, static_folder="static")
# ... SQLAlchemy and Caching setup omitted from here
app.config["SWAGGER"] = {
    "title": "Sensorhub API",
    "openapi": "3.0.4",
    "uiversion": 3,
}
swagger = Swagger(app, template_file="doc/sensorhub.yml")
This is actually everything you need to do to make the documentation viewable. Just point your browser to
http://localhost:5000/apidocs/ after starting your Flask test server, and you should see the docs. NOTE: Flasgger requires all YAML documents to use the start of document marker, three dashes
---.Modular Swaggering
Git branch: ex3-02-docstring-yml, ex3-03-multiple-yml
If holding all of your documentation in a ginormous YAML file sounds like a maintenance nightmare to you, you are probably not alone. Even by itself OpenAPI supports splitting the description into multiple files using file references. If you paid attention you may have noticed that the YAML file was passed to Swagger constructor as template_file. This indicates it is intended to simply be the base, not the whole documentation.
Flasgger allows us to document each view (resource method) in either a separate file, or in the method's docstring. First let's look at using docstrings. In order to document from there, you simply move the contents of the entire
operation object
inside the docstring, and precede it with three dashes. This separates the OpenAPI part from the rest of the docstring. Here is the newly documented GET method for sensors collectionclass SensorCollection(Resource):
def get(self):
"""
This is normal docstring stuff, OpenAPI description starts after dashes.
---
description: Get the list of managed sensors
responses:
'200':
description: List of sensors with shortened location info
content:
application/json:
example:
- name: test-sensor-1
model: uo-test-sensor
location: test-site-a
- name: test-sensor-2
model: uo-test-sensor
location: null
"""
body = {"items": []}
for db_sensor in Sensor.query.all():
item = db_sensor.serialize(short_form=True)
body["items"].append(item)
return Response(json.dumps(body), 200, mimetype=JSON)
The advantage of doing this is bringing your documentation closer to your code. If you change the view method code then the corresponding API documentation is right there, and you don't need to hunt for it from some other file(s). If you remove the sensors collection path from the tempalte file and load up the documentation, the GET method should still be documented, from this docstring. It will show up as
/api/sensors/ however, because Flasgger takes the path directly from your routing. One slight inconvenience is that you can't define parameters on a resource level anymore, and have to include them in every operation instead. In other words this small part in the sensor resource's documentation
parameters:
- $ref: '#/components/parameters/sensor'
has to be replicated in every method's docstring. References to the components can still be used, as long as those components are defined in the template file. For instance, documented PUT for sensor resource:
class SensorItem(Resource):

    def put(self, sensor):
        """
        ---
        description: Replace sensor's basic data with new values
        parameters:
        - $ref: '#/components/parameters/sensor'
        requestBody:
          description: JSON document that contains new basic data for the sensor
          content:
            application/json:
              schema:
                $ref: '#/components/schemas/Sensor'
              example:
                name: new-test-sensor-1
                model: uo-test-sensor-plus
        responses:
          '204':
            description: The sensor's attributes were updated successfully
          '400':
            description: The request body was not valid
          '404':
            description: The sensor was not found
          '409':
            description: A sensor with the same name already exists
          '415':
            description: Wrong media type was used
        """

        if not request.json:
            raise UnsupportedMediaType

        try:
            validate(request.json, Sensor.json_schema())
        except ValidationError as e:
            raise BadRequest(description=str(e))

        sensor.deserialize(request.json)
        try:
            db.session.add(sensor)
            db.session.commit()
        except IntegrityError:
            raise Conflict(
                "Sensor with name '{name}' already exists.".format(
                    **request.json
                )
            )

        return Response(status=204)
Another option is to use separate files for each view, and the swag_from
decorator
. In that case you would put each operation object
into its own YAML file and place it somewhere like doc/sensorcollection/get.yml. Then you'd simply decorate the methods like this:@swag_from("doc/sensorcollection/get.yml")
class SensorCollection(Resource):
def get(self):
...
Or if you follow the correct naming convention for your folder structure, you can also have Flasgger do all of this for you without explicitly using the swag_from decorator. Specifically, if your file paths follow this pattern:
/{resource_class_name}/{method}.yml
then you can add "doc_dir" to Flasgger's configuration, and it will look for these documentation files automatically. Note that your filenames must have the .yml extension for autodiscover to find them, .yaml doesn't work. One addition to the config is all you need.
app.config["SWAGGER"] = {
    "title": "Sensorhub API",
    "openapi": "3.0.4",
    "uiversion": 3,
    "doc_dir": "./doc",
}
Ultimately how you manage your documentation files is up to you. With this section you now have three options to choose from, and with further exploration you can find more. However it needs to be noted that currently Flasgger does not follow file references in YAML files, so you can't go and split your template file into smaller pieces. Still, managing all your reusable components in the template file and the view documentations elsewhere already provides some nice structure.
Deploying Flask Applications
The rest of this material is split into two different options. You only need to go through one of them. The first one is recommended if you have very little experience with Linux servers. The second one is recommended if you know your way around Linux servers, and would like to learn a little bit about how to run your API with containers. Whichever option you choose, there will be a test at the very end of this page.
Deployment of web applications is a major topic in today's internet environment. Large numbers of simultaneous users cause pressure to create applications that can be scaled via multiple vectors. Web applications span across multiple servers, and are increasingly often composed from
microservices
- small independent apps that each take care of one facet of the larger system. Our single process test server we've been using so far isn't exactly going to cut it anymore. In this section we will take a brief look into how you can turn your flask app into a serviceable deployment that can handle at least a somewhat respectable amount of client connections.There are two immediate objectives for our efforts: first, we need to add parallel processing for our app; second, it needs to be managed automatically by the system. After these steps we also need to make it available.
Some amount of parallelism is always desired in web applications because they tend to spend a lot of their time on I/O operations like reading/writing to sockets, and accessing the database. Using multiple processes or threads allows the app to perform more efficiently. As a microframework Flask doesn't come with anything like this out of the box (neither does Django for that matter). Luckily there are rather straightforward solutions to this problem that are applicable to all kinds of Python web frameworks, not just Flask.
The benefit of managing something automatically should be rather obvious. A web application is not very useful if it closes when you close the terminal that's running it e.g. by logging out of a server. Similarly it's rather bothersome if it needs to be manually restarted when it crashes or the server gets rebooted. The goal is usually achieved in one of the two ways: either by using
daemon
processes in Linux on more traditional server deployments, or by using container
orchestration. Well, it's really just one way because containers are also managed by daemon processes, but they are often configured via cloud application platforms like Kubernetes.Finally, in order to make an application available, it needs to be served from a public facing interface, usually the HTTP port 80 or the HTTPS port 443. This is typically not done directly by the application itself as there are multiple problems involved for both performance and security. In typical deployments, applications are sitting comfortably behind web servers that forward client requests to them and take care of the first line of security.
Please be aware that some parts of this material can only be done in UNIX based systems. If you don't have one, it might be a good time to learn how to roll up a virtual Linux machine by using Oracle VM Virtualbox. All of the instructions are also only written for UNIX based systems. While we assume readers have very little Linux experience, we're not going to explain every single command used. If you want to know more, look them up.
The end of goal of this exercise is that you are able to deploy an API somewhere in a way that it can be accessed from the internet. We have resources available in the CSC cloud as discussed in this guide. If you are going to use course resources, go through all of the steps on a local VM first, then repeat them in the course cloud resources so that you can get everything set up in a short time frame.
If you would rather use another service that you are already familiar with, you can also do that.
We have created a VM (VirtualBox) for you to test. It runs Lubuntu 24.04. You can download from here or if you are in University network you can access directly from:\\kaappi\Virtuaalikoneet$\VMware\PWP2025\PWP.ova. The user is pwp and the password is pwp
If you are already familiar with deploying Python applications, it should be fine to skip most of the sections.
Test Application
For all of these examples we are going to use the sensorhub app created in exercise 2 extra material. This allows us to dive a little bit deeper than most basic tutorials that simply install a web app that says hello, with no database connections or API keys etc to set up. Whenever you need to set up the application, use these lines. Working inside a virtual environment owned by your login user is assumed, and your current working directory should be the virtual envinronment's root.
Download the project, install and it and do the basic setup.
git clone https://github.com/UniOulu-Ubicomp-Programming-Courses/pwp-sensorhub-example.git sensorhub
cd sensorhub
git checkout ex2-project-layout
pip install .
flask --app=sensorhub init-db
flask --app=sensorhub testgen
flask --app=sensorhub masterkey
Copy the master key somewhere if you want to actually be able to access anything in the API afterward. It may also be useful to know that when using virtual environments in Linux, the Flask
instance folder
will be /path/to/your/venv/var/sensorhub-instance by default.(Green) Unicorns Are Real
First we are going to introduce Gunicorn. It's a Python
WSGI
HTTP server that runs processes using a pre-fork model. And because that's quite the word salad, it's actually just faster to show how to do it in practice first. Let's assume we have set up sensorhub following the instructions above, and we are working in an active virtual environment. From here it takes two entire lines to install Gunicorn and have it run the sensorhub app:python -m pip install "gunicorn<25" gunicorn -w 3 "sensorhub:create_app()"
Installing version 24.1.1 of Gunicorn as 25.1.0 seems to have problems with randomly failing to start a worker and hanging up indefinitely.
Congrats, you are now the proud owner of 3 sensorhub processes, as determined by the optional argument
-w 3 in the command above. The mandatory argument ("sensorhub:create_app()" in our case) identifies the callable that HTTP requests are passed to - for Flask it is the Flask application object. The module where the callable is found is given as a Python import path, same way you would give it when running something with python -m or importing it into another module. In the case of the project we're working, the Flask application object is created by the create_app function, and therefore we need to define a call to the function in order to obtain it. For single file applications where you just define app into a variable, you would use sensorhub:app.These processes are managed by Gunicorn. The "pre-fork model" part of the description means that the worker processes are spawned in advance at launch, and HTTP request are handled by the workers. This is in opposition to spawning workers or threads for incoming requests during runtime.
If you check Gunicorn's help you can see that it has about 60 other optional arguments so there's definitely a lot more to using it than what we just did above. A vast majority of these options exist to support different deployment configurations, or to optimize the worker processes further. We don't actually have enough data about the performance of our app to know what should be optimized about its deployment, so we will leave these untouched. We're just going to use the initial recommendation of using 2 workers per processor core + 1 worker.
Option 1: Using a Traditional Server VM
Choose this option if you are not familiar with using Linux on the command line
In this option we will have two different paths to managing the API application itself. The path converge at the end where we will have it run behind NGINX to make it available for the world.
Path 1: Management With Supervisor
Linux is required from here on. Also from this point onward it is recommended that you work on a virtual machine that you can just throw away once you're done. We are about to install things that get automatically started, and cleaning up everything afterward is just a pain in general.
The next piece of the puzzle is Supervisor. As per its documentation, "Supervisor is a client/server system that allows its users to monitor and control a number of processes on UNIX-like operating systems." It is generally used to manage processes that do not come with their own daemonization. Most Python scripts fall under this category. Supervisor allows its managed processes to be automatically started and restarted, and also offers a centralized way for users to manage those processes - including the ability to allow non-admin users to start and restart processes started by root (we'll get back to why this is imporant later).
Preparing Your App for Daemon Possession
When moving a process to be controlled by Supervisor (or any other management system), there's usually two things that need to be decided:
- How are configuration parameters passed to the process
- How to write logs
If your process needs to read something from
environment variables
, these need to be set for the environment it's running in. This also applies to activating the virtual environment. A straightforward way to achieve both of these goals with one solution is to write a small shell script that sets the necessary environment variables and activates the virtual environment. The best exact way to manage configuration depends on what framework is used, and whether the configuration file is included in the project's git repository or not.Since Flask has a built-in way to read configuration from a file in its instance folder, a separate configuration file is the recommended way. As it's in the instance folder, it will not go into the project's repository. This means it's suitable for storing secrets too, as long as the file's ownership and permissions are properly set so that it's only readable by the
system user
that runs your application. The downside is that your project can't ship with a default configuration file but this is rather easily solved by implementing a terminal command to generate a default configuration file.However, just in case you are working with a rather simple single file application, we're going to use environment variables in this example to show another way to do it. When doing so it's important to only read them from a secure file at process launch, and also immediately remove any variables that contain secrets after reading them into program memory. It should be stressed that regardless of how carefully you handle environment variables, properly secured configuration files are still a better approach if you have a way to manage them.
In this example the chosen approach is to create a second script into the virtual environments bin folder called postactivate. This will be invoked exactly like the activate script so it's convenient to use in both development and deployment. The only difference is that if there are any secrets in this file, its owner should be set to the system user that runs the process, and its permissions to 400 when deploying to production. This user should also be the owner of the local git repository. Since until now you have probably just used your login user for everything, we'll start with a full list of steps. Let's assume our project will be in
/opt/sensorhub/sensorhub and its virtual environment in /opt/sensorhub/venv.- Create the system user, e.g. sensorhub
sudo useradd --system sensorhub- (Development only) add your login user to the sensorhub group. You would need to do this in order to be able to follow the next instructions (even if you are in production, you might change groups later)
sudo usermod -aG sensorhub $USER- So the group change takes effect try to force the group change in current session:
exec su -p $USERid- If your user does not show the group
sensorhubyou would need to logout and log back in your linux session. - Create the sensorhub folder and grant ownership to sensorhub user, drop all privileges from other users
sudo mkdir /opt/sensorhubsudo chown sensorhub:sensorhub /opt/sensorhubsudo chmod -R o-rwx /opt/sensorhub- Install the venv module for system Python
sudo apt updatesudo apt install python3.12-venv- Create a virtual environment with the sensorhub user
sudo -u sensorhub python3 -m venv /opt/sensorhub/venv- Clone the repository and perform database initialization etc. with the sensorhub user.
sudo -u sensorhub git clone https://github.com/UniOulu-Ubicomp-Programming-Courses/pwp-sensorhub-example.git /opt/sensorhub/sensorhub- Create the postactive file
sudo -u sensorhub touch /opt/sensorhub/venv/bin/postactivate- (Production only) change file permissions to owner only
sudo chmod 600 /opt/sensorhub/venv/bin/postactivate- Add any required environment variables to the file as. For this example let's set the number of workers in this file by adding this line to it:
export GUNICORN_WORKERS=3- Activate the virtual environment for your user and add environment variables
source /opt/sensorhub/venv/bin/activatesource /opt/sensorhub/venv/bin/postactivate- Install the project with pip as the sensorhub user while passing your environment to the process (otherwise it will try to run with system python instead)
cd /opt/sensorhub/sensorhubsudo -u sensorhub git checkout ex2-project-layoutsudo -u sensorhub -E env PATH=$PATH python -m pip install .- Set up database and masterkey
sudo -u sensorhub -E env PATH=$PATH flask --app=sensorhub init-dbsudo -u sensorhub -E env PATH=$PATH flask --app=sensorhub testgensudo -u sensorhub -E env PATH=$PATH flask --app=sensorhub masterkey- Run Gunicorn as sensorhub user
cd /opt/sensorhub/sensorhubsudo -u sensorhub -E env PATH=$PATH gunicorn -w $GUNICORN_WORKERS "sensorhub:create_app()"
If this runs successfully without permission errors, your application setup should be ready to be run with Supervisor as well. To check it you can send a HTTP GET request to the
sensors resource: curl http://127.0.0.1:8000/api/. It should return and answer with name and version of the api. While this was a lot of steps, it's a solid crash course in putting Python code into servers in general. Obviously if you would need to do this for multiple servers, at that point it's best to look into either containerization, or deployment automation with something like Ansible. If you only need to deal with one server, doing this process once isn't too bad since updates really only need you to pull your code, install your project with pip, and then restart the processes (with Supervisor).
The last thing we need to do is to write the shell script that allows Supervisor to run this app. A good place to put this is the scripts folder inside your virtual environment. We'll start by creating the folder and creating a runnable script file
sudo -u sensorhub mkdir /opt/sensorhub/venv/scriptssudo -u sensorhub touch /opt/sensorhub/venv/scripts/start_gunicornsudo chmod u+x /opt/sensorhub/venv/scripts/start_gunicorn
Here are the contents of the file for now. Copy them in there with your preferred text editor.
#!/bin/sh

cd /opt/sensorhub/sensorhub
. /opt/sensorhub/venv/bin/activate
. /opt/sensorhub/venv/bin/postactivate

exec gunicorn -w $GUNICORN_WORKERS "sensorhub:create_app()"
If you can now run your app with
sudo -u sensorhub /opt/sensorhub/venv/scripts/start_gunicorn everything should be ready for the next step.Commence Supervision
Compared to the previous step, the matter of actually running your process via Supervisor is a lot more straightforward. Supervisor can most probably be installed via your operating system's package manager, i.e.
sudo apt install supervisor on systems that use APT. In order for Supervisor to manage your program, you will need to include it in Supervisor's configuration. This is usually best done by placing a .conf file in /etc/supervisord/conf.d/. The exact location and naming convention can be different. For instance on RHEL / CentOS it would be a .ini file inside /etc/supervisord.d.To explain very briefly in case you've never seen this: this mechanism of storing custom configurations for programs installed by the package manager as fragments in a
.d directory inside the program's configuration folder instead of editing the main configuration is intended to make your life easier. The default configuration file is usually written by the package manager, and if there is an update to it, any custom changes in the main configuration file would be in conflict. If all custom configuration is in separate files instead, they will be untouched by the package manager, and always simply be applied after the default configuration has been loaded. As they are loaded after, they can also include overrides to the default configuration.The .conf files used by Supervisor follow a relatively common configuration file syntax where sections are marked by square braces, and each configuration option is just like a Python variable assignment with =. For Supervisor specifically, configuration sections that specify a program for it to manage must follow the syntax
[program:programname]. With that in mind, in order to have supervisor run Gunicorn with the script we wrote in the previous section, we can create the .conf file with sudo touch /etc/supervisor/conf.d/sensorhub.conf and then drop the following contents into it.[program:sensorhub] command = /opt/sensorhub/venv/scripts/start_gunicorn autostart = true autorestart = true user = sensorhub stdout_logfile = /opt/sensorhub/logs/gunicorn.log redirect_stderr = true
The last two lines are for writing Gunicorn's (and by proxy our application's) output and error messages into a log file. For this simple example we're using a folder that's inside the sensorhub's folder. Most logs in Linux would generally go to
/var/log but our sensorhub user doesn't have write access there for now, and this way when you are done playing with this test deployment you will have less places to clean up. The log directory also needs to be created:sudo -u sensorhub mkdir /opt/sensorhub/logs
With this we should be ready to reload Supervisor:
sudo systemctl reload supervisor
You can check the status of your process from supervisorctl, and manage it with commands like start, restart, and stop.
$ sudo supervisorctl
sensorhub                        RUNNING   pid 327471, uptime 0:00:24
supervisor> restart sensorhub
sensorhub: stopped
sensorhub: started
supervisor>
Again an HTTP GET request to
/api/ should return the information of our api: curl http://127.0.0.1:8000/api/Path 2: Docker Deployment
This section offers an alternative to using Supervisor: using Docker to run your application in a container instead. Docker also allows automatic starting of containers, so it can fulfill a similar role. Containers are akin to virtual machines, but they only virtualize the application layer, i.e. allowing each application to have its libraries and binaries indepedently of the main operating system. In this sense they are also very similar to Python virtual environments but more isolated than that. Unlike a full-blown VM, container typically runs just one application, and if multiple pieces need to collaborate such as NGINX and Gunicorn in the examples to come, these would be placed in separate containers inside the same pod (see later section).
Whether you went through the Supervisor tutorial above or not, you should read this section if you're not familiar with Docker because it's relevant for Rahti 2 deployment later.
First matter at hand is to install Docker, which is simple enough:
sudo apt install docker-buildx. This will install the docker build package as well as the docker packages. If your distribution do not contain those packages you can try to install from official docker website# Add Docker's official GPG key:
sudo apt-get update
sudo apt-get install ca-certificates curl
sudo install -m 0755 -d /etc/apt/keyrings
sudo curl -fsSL https://download.docker.com/linux/ubuntu/gpg -o /etc/apt/keyrings/docker.asc
sudo chmod a+r /etc/apt/keyrings/docker.asc
# Add the repository to Apt sources:
echo \
"deb [arch=$(dpkg --print-architecture) signed-by=/etc/apt/keyrings/docker.asc] https://download.docker.com/linux/ubuntu \
$(. /etc/os-release && echo "${UBUNTU_CODENAME:-$VERSION_CODENAME}") stable" | \
sudo tee /etc/apt/sources.list.d/docker.list > /dev/null
sudo apt-get update
sudo apt-get install docker-ce docker-ce-cli containerd.io docker-buildx-plugin docker-compose-plugin
Running Python applications is also rather simple with Docker using existing official Python images from Docker Hub. These images come with everything you need to run a Python application, and all your dockerfile needs to do is install any required packages, and define a command to run the application. Whenever possible, the Alpine image variant should be used. It has the smallest image size, but more limitations to packages that can be installed. If you can't build your project with it, move up to the slim variant, and finally to the default.
Container Considerations
Because the container is running in its own, well, container, it is unable to communicate directly with the host machine. This means that when running the container, any connections between the host and the container need to be defined. These need to be defined from the host side when when launching the container, because otherwise the container itself would not be easily transferrable to different hosts. Any web application will at least need a port opened so it can receive HTTP requests. This is done my mapping a port from the host to the container so that connections to the host port will be forwarded to the application.
Another matter when using containers is the use of shared volumes, since again by default the container has its own file system and cannot see the host's file system. Everything inside a container is deleted when it's destroyed, and as containers are expected to be expendable, it naturally follows that any sort of data that is supposed to persist must therefore live on the host system, or an entirely external location such as a database server. Since we have been using SQLite so far, this part of the example shows how to share an instance folder on the host with a container that is running the app. So we will be initializing and populating the database on the host machine first, and then run our container so that it has a database ready for use.
Creating Images From Dockerfiles
In order for Docker to be able to run an app, a dockerfile needs to be defined. The sensorhub example comes with the following dockerfile ready to go:
These files are relatively simple to understand but let's go through each instruction. These instructions are run in order.
FROM- This instruction defines what base image to use for the container. Image choice defines the majority of what will be inside the container, and therefore also its file size. Here we have chosen the Alpine version of Python 3.13 image as our application doesn't need anything particularly special to work. This results in an image of roughly 120MB.WORKDIR- This will cd into the specified folder inside the container file system. If the path does not exist, it will be automatically created. It can be anything really, we chose to use the same path as the official Python image examples.COPY- Copies contents from a host path to the container. In this file both are just.which means everything from current host working directory is copied into the working directory in the container. The copy operation is always recursive.RUN- This instruction defines commands that are executed when building the image. In our example we need to install the app with pip. Run instructions are typically written in shell form, i.e. the same as you would type it into your terminal. There can be any number of these in the file. Only the first command is relevant for now, the rest will have meaning later.CMD- This instruction defines how the application is run. Only one of these can be in a dockerfile. These are usually given in the exec format where the command and its arguments are presented as a list of strings. The added -b argument (host) for Gunicorn is important - without it, Gunicorn will reject any requests because the hostname will not match the address (localhost) it thinks it's running in, and will be the container's IP address instead.
If you have more specific needs for your image, you can find more information about Dockerfiles from the Dockerfile reference. Looking into the intricacies of how
CMD and ENTRYPOINT differ and interact with each other is highly recommended, but not important for going through examples in this material.Now that we have some understanding of what this dockerfile does, we can build it.
sudo docker build -t sensorhub .
This command will build the contents of the specified path (
.) into an image named sensorhub, which will be stored in the local Docker image storage.You can always check which are the docker images available in your computer using
sudo docker imagesIf you want to remove a docker image you can always do:
sudo docker rmi But at this stage, let's not remove it.
Running Containers
After building the image you can launch containers from it. The first run example is intended for testing. It keeps the process running inside your terminal so that you can easily see its output and interact with it (e.g. to stop it with Ctrl + c) (
-it argument), and it will also destroy the container when it exits (--rm argument). As discussed earlier, the run command here also needs to define port mapping (-p argument, publish), and shared volume so that the container can access an existing instance folder -v argument, volume).docker run -it --rm -p 8000:8000 -v /your/venv/var/sensorhub-instance:/usr/src/app/instance \
--name sensorhub-testrun sensorhub
Please note that we are mapping the instance folder in our machine with the instance folder in the docker instance, so we always have access to the database.
When you run the container successfully, it will mostly look the same as running Gunicorn directly.
[2025-02-18 13:09:28 +0000] [1] [INFO] Starting gunicorn 23.0.0
[2025-02-18 13:09:28 +0000] [1] [INFO] Listening at: http://0.0.0.0:8000 (1)
[2025-02-18 13:09:28 +0000] [1] [INFO] Using worker: sync
[2025-02-18 13:09:28 +0000] [7] [INFO] Booting worker with pid: 7
[2025-02-18 13:09:28 +0000] [8] [INFO] Booting worker with pid: 8
[2025-02-18 13:09:29 +0000] [9] [INFO] Booting worker with pid: 9
If you have errors indicacating that address is already in use, you need to be sure that gunicorn or other service aren't using the port 8000
sudo lsof -i :8000If you are running gunicorn, it might be that it could be running from previous tasks. You can try to kill the process. If it is running via supervisor, you would need to cancel the process in supervisor:
sudo supervisorctl stop sensorhubThe 0.0.0.0 as listen address means that Gunicorn will accept connections that have any IP as the host header. The port mapping
-p 8000:8000 means that if you point your browser to localhost:8000 it will be forwarded to your container, and you should see the response from your app. Also to check that the shared volume was correctly set up, you can try to get the /api/sensors/ URI. This should give you a permission error because you didn't send an API key. If it gives you an internal server error instead, the instance folder is not being correctly shared (or you forgot to create and populate a database there).If you would need to open a shell in the docker instance to call certain commands, try
sudo docker exec -it sensorhub-testrun shAs for our last trick, we'll modify the run command so that the container will run in the background instead, and be restarted when the Docker daemon is restarted.
docker run -d -p 8000:8000 --restart unless-stopped \
           -v /your/venv/var/sensorhub-instance:/usr/src/app/instance \
           --name sensorhub-testrun sensorhub
You can stop this container with
docker stop sensorhub-testrun. If stopped this way, or if an error is encountered, this container will not restart. If you want to restart on errors, you can use "always" as the restart policy instead of "unless-stopped". This container is no longer automatically removed so if you want to remove it, use docker rm sensorhub-testrun.You can test that the API is running correctly with curl:
curl http://127.0.0.1:8000/api/
Start Your Engine X
This step can be done after either of the above two paths with no differences.
In our current state, the application is still serving requests from port 8000 which is the Gunicorn default. Now, of course you could open this port to the world from your server's firewall, but there will probably be firewalls above your firewall that would still block it, because most of the time web servers are only expected to handle connections to the HTTP and HTTPS ports, 80 and 443, respectively. So, what's stopping us from just binding Gunicorn to these ports? Well, UNIX is. Non-root users are not allowed to listen on low-numbered ports. Running your application as root is also a terrible idea, in case you were wondering. Currently if there is a vulnerability in your app, the most damage it can do is to itself because the sensorhub user just doesn't have a whole lot of privileges outside its own directory.
There is another reason as well why you should never serve your app directly by Gunicorn:
static files
. Not everything that gets accessed from your server is a response generated by application code; sometimes it also serves files that are simply read from disk and sent to the client as-is. In this case serving these files through static views in your application causes unnecessary overhead. The recommended setup is to have an HTTP web server
sit between the wide world and your application. This server's task is to figure out whether a static file is being requested (usually identified by the URL), and if not, forward the request to Gunicorn workers. One other thing is also that if you need to use HTTPS for encryption, it can be handled in the web server, and neither Gunicorn or your application need to bother with it.The two most commonly used HTTP web servers in Linux are Apache and NGINX. Out of the two Apache has been in steady decline, so we have chosen to use NGINX for this example. It is also somewhat friendlier to work with. The process is more or less similar to what we had to do with Supervisor: install the server, and create a configuration file for our app. So, install it with your package manager, and then figure out where the configurations should go. Where this was written, they go to
/etc/nginx/sites-available. Configuration files are made up of directives. Simple directives are written just as directive name and then its arguments separated by spaces, whereas complex directives that can contain other directives are enclosed within curly braces.The configuration we're using is mostly just taken from the example in Gunicorn's documentation. The main difference being that the example there is a full configuration file, and we are only going to use its server directives with the default NGINX configuration, and put them into a separate file as described earlier for Supervisor. The configuration file is below, and explanations have been added as comments to the file itself. Overall to use NGINX efficiently in big deployments there would be a lot to learn, but for our current purposes this simple configuration is good enough. Save the contents of this file to
/etc/nginx/sites-available/sensorhub.When deploying on a live server, remember to change line 36 from localhost to your server's hostname! For VMs in Pouta this means the name in the form of
fip-x-x-x-x.kaj.poutavm.fi.It's very likely that NGINX was automatically started (and added to autostart as well) when it was installed. It's currently serving its default server configuration from the
/etc/nginx/sites-available/default file. The way in which site configurations are managed, is usually by using symbolic links from /etc/nginx/sites-enabled/ to /etc/nginx/sites-available/. This way multiple configuration files can exist in sites-available, and the symbolic links can be used to choose which ones are actually in use. In order to make our new sensorhub configuration the main one, run these two commands, and then reload NGINX configuration with the third onesudo ln -s /etc/nginx/sites-available/sensorhub /etc/nginx/sites-enabled/sensorhub sudo rm /etc/nginx/sites-enabled/default sudo systemctl reload nginx
If Supervisor or Docker is still running your app, checking e.g.
localhost/api/sensors/ with your browser should now show a response from the app.Option 2: Using Rahti Containers
This option assumes you have a solid grasp on Linux fundamentals, understanding things like permissions, ports, and file system. If in doubt go back to option 1, it has more explanation for what is being done.
The instructions above allow you to manually install your app and NGINX on a Linux server. This is useful, fundamental information, and it also allows you to understand a little bit more about what might be taking place underneath the surface when using a cloud application platform. However as you probably know already, using cloud platforms is how things are usually done when scaling and ease of deployment are required.
In order to run the NGINX -> Gunicorn -> Flask app chain in Rahti, we need to put all components in the same pod. When containers are running inside the same pod, they will have an internal network that allows them to communicate with each other. This of course means that we now need to stuff NGINX into a container as well. More specifically, we need to stuff it in a container in a way that it works with OpenShift. Normally NGINX starts as root and then drops privileges to another user, allowing it to listen on privileged port but not actually giving root privileges to anything that runs on it. OpenShift does not allow running anything as root. This means that the user NGINX is run as must be the same the whole time, and that it cannot listen on privileged ports.
NGINX in a Box
We've provided the necessary files in a second Github repository. They've been forked from CSC's tutorial project and fitted for our example. We'll only cover them briefly in this section. For now there's two files to care about: the dockerfile and the configuration file. The latter is almost the same as the file we showed you earlier. The dockerfile is shown below.
The most notable thing about this file is the rather long RUN instruction. Chaining command together into one RUN instruction with the AND (&&) operator is a practice to reduce image size. This is because every instruction creates a new layer in the image. Layers are related to build efficiency and you can read more about them in Docker's documentaton. Essentially nothing in our RUN instruction is worth saving as a layer, so it's better to do everything at once. The instruction itself makes certain directories in the file system accessible to users in the root group, and finally does some witchcraft with sed to the
nginx.conf file:- Comment out the user directive - processes started by non-root users cannot change uid.
- Comment out server_names_hash_bucket_size directive just in case - it's not currently defined in the images's default configuration, but you never know if it gets added back in the future.
- Add the same directive and set it to a higher value than the default. Rahti's hostnames are too long for the default size.
The other part is the configuration, which is now a template. NGINX configuration does not normally read environment variables but if you make templates and put them in
/etc/nginx/templates instead, configuration files will be generated from these templates instead, and environment variables will be substituted with their values in the process. This is necessary because we need to be able to configure the server's server_name without modifying the image. We also changed the listen port to 8080 because we cannot listen to 80 without root privileges.The root path was changed but it doesn't really matter right now because we're not serving any static files. Just take note of this because earlier NGINX was running with access to the file system where the Sensorhub's static files were. Now they will be in another container, which means they are no longer accessible directly, and some amount of sorcery is required to make the static files accessible again. We are not covering this sorcery here.
Note also that instead of doing things with sites-available and sites-enabled, we're just copying the configuration over the default.conf file. This NGINX container is only for serving a single application so bothering with elaborate configuration management is overkill, and would just add unnecessary instructions to the dockerfile. You can just build the image and do a test run now. Note that the HOSTNAME environment variable needs to be set when running the image now.
sudo docker build -t sensorhub-nginx .
sudo docker run --rm -p 8080:8080 -e HOSTNAME='localhost' sensorhub-nginx
If you try to visit localhost:8080 in your browser, you should be greeted by 502 Bad Gateway because Gunicorn is in fact not running.
Flask in the Same Box
To avoid creating duplicate images to public repositories, the examples below use pre-built images of Sensorhub and its NGINX companion that we have uploaded to Docker Hub. We could technically also instruct you how to manage a local image repository instead but this tutorial already has quite a lot of stuff in it.
In this case, since we are deploying to a cluster, and at some point upload it to Rahti 2, the user running gunicorn cannot be root. Hence, we have modified the dockerfile, so everything goes to /opt/sensorhub folder and run by user sensorhub. You do not need this file to follow this explanation since we are giving the images. But this would be necessary if you would like to create your own image. Finally: be sure that your repo does not contain the instance folder. Otherwise, image generation will fail.
In order to get more than one container to run in the same pod, we need to learn some very basics of container orchestration. The
Deployment.yaml file in the repository (check the templates folder) is the final product that allows the pod to be run in Rahti 2. In order to better understand the process, we're going to start from something slightly simpler that you can run on your own machine. This example uses Kubernetes for orchestration, as it is the base of OpenShift and most things will remain the same when moving to Rahti. You can also check Docker's brief orchestration guide for a quick start.In this case, since we are deploying to a cluster, and at some point upload it to Rahti 2, the user running gunicorn cannot be root. Hence, we have modified the dockerfile, so everything goes to /opt/sensorhub folder and run by user sensorhub. You do not need this file to follow this explanation, because, remember, we are giving the images. But this would be necessary if you would like to create your own image.
If you feel like you already know this stuff, you can skip ahead to where we start deploying things in Rahti.
Before we can run anything, we need access to a Kubernetes cluster. For now, we're going to use Kind to run a local development Kubernetes cluster. See Kind's quick start guide for installation instructions, or use the following spells to grab the binary.
curl -Lo ./kind https://kind.sigs.k8s.io/dl/v0.27.0/kind-linux-amd64
chmod +x ./kind
sudo mv ./kind /usr/local/bin/kind
You would need to install also
kubectl. If you are using ubuntu: sudo snap install kubectl --classicYou will also need the following small configuration file for starting your cluster. Otherwise you cannot access things running in the cluster without explicit port forwarding. The port defined here (30001) must match the service's nodePort in the service configuration later.
sudo kind create cluster --config test-cluster.yml
Next we need to define a deployment and a service. These can be included in the same file by defining two documents inside it using
--- as a separator (indicates "start of document" in YAML). The file below has been adopted from Docker's Kubernetes deployment tutorial. The biggest modification is running two containers in the pod instead of just one. As stated earlier, the images are pulled from Docker Hub.Most of the file is just the minimum definition to make the deployment run and take connections. For instance, labels must be defined, and the service part must have a selector for the labels. If you were to operate a massive real-life deployment then these would have more meaning than just "having to exist", but that is a topic for another course. The template part is where the actual containers are defined. These are also very simple in our example, the fields are briefly explained below.
- name: Identifier for this container
- image: Where the container image comes from
- imagePullPolicy: One of Always, IfNotPresent, or Never. Set to Always in most cases, unless images are pre-pulled, see Kubernetes docs for more info.
- ports: Optional. The containerPort values listed here are informational, and not strictly required for the deployment to work. Basically just here to inform what ports are being listened to by the container.
- env: List of environment variables, here's where we set HOSTNAME
The service part of this file is what routes traffic to the pod(s). In this example we're using the NodePort type as that allows connecting to the pod from localhost for testing. The ports listed here are
- port: The port exposed by the service inside the cluster. If another application needs to communicate with this one, it would hit this port.
- targetPort: The port inside the service where any connections to the above port are forwarded. If omitted, will be the same as port. In our case this needs to be the port NGINX is listening to.
- nodePort: A port on localhost (i.e. the machine where the cluster is running) that can be accessed to connect to the service. As stated earlier, must be the same port that was defined in the cluster configuration.
With this file you can run the whole thing in your local cluster. But since we are working in local machine, you should modify the
HOSTNAME environments variable, and subsitute it by localhost. After this change we can run the cluster with:sudo kubectl apply -f sensorhub-deployment.yml
After a short while your pod should be up. If you hit
localhost:30001 in your browser you should get a response from the Flask application. Unfortunately it doesn't have a database set up so all it can give you is internal server errors or not founds, depending which URI you hit. This still does mean the setup is working correctly as a whole since traffic is being routed all the way to the app. You can also check your deployments with:sudo kubectl get deployment
Replace deployment with pod to see the pod that is managed by the deployment. You can also try to play whack-a-mole with your pods to see how they get restarted automatically:
sudo kubectl delete pod -l "app=sensorhub"
Adding Persistent Volume
Pods can mount data that is maintained in the cluster by using persistent volume claims. This is a reasonable way to get the Flask instance folder stored between pod restarts, and is essentially the Kubernetes way for doing the volume mount we previously did from the command line with Docker directly. This process starts by defining a persistent volume claim, which you can do by adding the following snippet into the existing
sensorhub-deployment.yml file.apiVersion: v1
kind: PersistentVolumeClaim
metadata:
name: sensorhub-pvc
spec:
accessModes:
- ReadWriteOnce
resources:
requests:
storage: 32Mi
This volume claim has a name that can be referred in the configuration for containers. The access mode used here is the same one that is available in Rahti: ReadWriteOnce. It is rather limiting, allowing the volume to only be mounted into exactly one pod at a time. It is sufficient for our testing purposes however. Finally we assign this volume a small amount of disk space, as we are not really going to do anything with it.
In order to make use of this volume, a volume needs to be defined in the spec part of the file, and then it needs to be mounted in the Sensorhub container's configuration. First add the
volumes object before the containers key in your file
volumes object before the containers key in your file
spec:
  ...
  template:
    ...
    spec:
      volumes:
      - name: instance-vol
        persistentVolumeClaim:
          claimName: sensorhub-pvc
The name here can be referred from a container configuration's volumeMounts. Add the following to the Sensorhub container's section:
spec:
  ...
  template:
    ...
    spec:
      containers:
      - name: sensorhub-testrun
        volumeMounts:
        - mountPath: /opt/sensorhub/instance
          name: instance-vol
Note that the path is different from when we were running Sensorhub in Docker earlier, since we are not running as root. After these additions your file should like this:
Now you can re-apply the entire file and your pod should now have a nice persistent volume attached to it. Let's finally go inside the pod and run the familiar set of initialization commands to make the API actually do something. In order to so, we will execute a new shell inside the container. This is in general very useful if you need to debug what's going on inside your containers. The selector
deploy/sensorhub-test-deployment will target the first pod in the deployment, which is fine because we only have one.sudo kubectl exec deploy/sensorhub-test-deployment -it -c sensorhub-testrun -- sh
This gives us a shell session that conveniently has
/opt/sensorhub as its working directory and we can run the three setup commands as always:flask --app=sensorhub init-db flask --app=sensorhub testgen flask --app=sensorhub masterkey
Grab the master key to clipboard before exiting the shell session with Ctrl + D. Finally, let's access the entire thing with curl:
curl -H "Sensorhub-Api-Key: <copied api key>" localhost:30001/api/sensors/
Finally the fun part where we whack the pod down, wait for it to restart, and witness how the volume does indeed persist.
sudo kubectl delete pod -l "app=sensorhub" curl -H "Sensorhub-Api-Key: <copied api key>" localhost:30001/api/sensors/
If everything went well, you should be getting the same result because the database contents are the same. Now we are essentially done with this local deployment, so if you don't want it running and restarting itself in the background anymore, you need to whack down the whole deployment. If you pass the file to delete, everything in it will be deleted. This includes your persistent volume contents so that database is now gone forever.
sudo kubectl delete -f sensorhub-deployment.yml
Are there better ways to initialize and populate your database than using a shell session in the container? Absolutely, but these are best figured out at another time. Like when you are using a real database instead of SQLite for instance. There is also a better way to set the API master key.
Moving to Rahti
In order to make this tutorial easier to follow, we are going to use the command line interface of OpenShift instead of trying to navigate the web UI. First thing to do is to download the binary and move it so that it's in the path.
wget https://downloads-openshift-console.apps.2.rahti.csc.fi/amd64/linux/oc.tar tar -xf oc.tar sudo mv oc /usr/local/bin/oc rm oc.tar
If you are working in a virtual environment, you can also put the oc binary into the virtual environments bin folder.
After this you need to login from the console. In order to do this, go to the Rahti 2 web console and obtain a login token by copying the entire login command from the user menu.
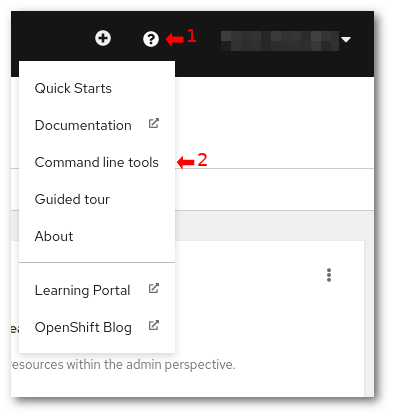
The login command should look like this:
oc login https://api.2.rahti.csc.fi:6443 --token=<secret access token>
Note this token does expire so if you take more than a day to complete all of this, you need to obtain a new API token. Just repeat the above steps if oc asks you to login again. If it says you have multiple projects, please pick the correct one before doing anything else.
oc project pwp-deploy-tests
We have premade the necessary files for the deployments. They are in the templates folder of the NGINX repository that was used in the previous step. All you need to do is change some values.
First you need to change the names and labels in the Deployment and Service files in order to avoid conflicts with other groups. The fastest way to do this is to use sed. You should do this in the root of the Sensorhub NGINX repository. Similarly you need to change the HOSTNAME environment variable to the actual hostname Rahti assigns to your app. In order to make the rest of the command easy to copy-paste, we'll start by exporting your group's name in lowercase, hyphenated form (e.g. "My Amazing Group" would become "my-amazing-group"). If your group name is long, shorten it to reasonable size as the Rahti hostnames are looooong already.
export PWPGROUP=<groupname> sed -i "s/sensorhub-nginx-deployment/$PWPGROUP-sensorhub/" templates/*.yaml sed -i "s/value: localhost/value: $PWPGROUP-pwp-2026.2.rahtiapp.fi/" templates/Deployment.yaml
The next four commands should fire up your deployment and service, and also create a route.
oc create -f templates/Deployment.yaml oc create -f templates/Service.yaml oc create route edge $PWPGROUP --service=$PWPGROUP-sensorhub --insecure-policy="Redirect" oc get route $PWPGROUP
The route should be the same that we asked you to replace localhost with. If it's not, you need to change it in the deployment file and then update your deployment with apply using
oc apply -f templates/Deployment.yaml.It takes a few seconds for Rahti to fire up your pod, but after that you should be able to get the index page with your browser or curl. If you get something else like 502 Bad Gateway, something is wrong with your configuration. First, check that both containers are running correctly with
oc get pod -l app=$PWPGROUP-sensorhub
Next, check NGINX logs with (change tail to larger value if you can't see anything useful),
oc logs -l app=$PWPGROUP-sensorhub -c nginx --tail=20
For further debug, get a shell into each of them with these commands:
oc exec deploy/$PWPGROUP-sensorhub -it -c nginx -- sh oc exec deploy/$PWPGROUP-sensorhub -it -c sensorhub -- sh
The most likely cause is in the NGINX configuration files. Check them with cat to see if there's anything off. You can also edit them with vim (short guide: press i to go into insert mode, do what you need, press Esc and type
:wq to save and exit) and then reload your configuration with nginx -s reload. If it starts working, great, do similar changes to your deployment file and try to re-apply to persist the changes.Remember you would need to configure the sensorhub and get the adequate key. For that, access to the docker instance where gunicorn is running and execute the commands that you already know by heart:
flask --app=sensorhub init-db
flask --app=sensorhub testgen
flask --app=sensorhub masterkey
When you are ready remember to close the pods so you do not consume that many resources:
oc delete deployment $PWPGROUP-sensorhub
oc delete service $PWPGROUP-sensorhub
oc delete route $PWPGROUP
Extra: Using a Real Database
This section is considered extra information, but it is very useful. In this section you'll learn how to set get a PostgreSQL database from CSC's Pukki service, and how to configure your Sensorhub container in Rahti to use it instead of SQLite. Once again the tutorial uses command line tools to communicate with Pukki, so the first thing is to follow instructions on how to set them up. The instructions are adopted from CSC's documentation.
Getting a Database from Pukki
First, you'll want to go back to using the virtual environment that was used when we created a VM with OpenStack, because it already has the necessary tools installed. After you are in the correct virtual env, login to Pukki and obtain the OpenStack RC File from the right hand user menu:
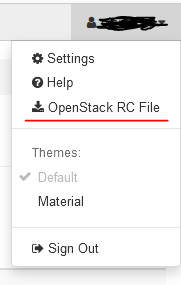
Save the file somewhere inside your virtual environment with a nice name like
pukki.sh, and source it withsource pukki.sh
You will be prompted for your CSC password. Check that it's properly connected e.g. with
openstack datastore list
At this point you are ready to create your database. We have already create the database instance (i.e. database server) that you should use, and it's called
exercise_3_instance. The only thing for you to do is to create a database, and a user that has access to it. We are going to assume that you are still in the same shell session where the $PWPGROUP environment variable is defined. You should also generate a password for your database and, for following these instructions, also put it in an environment variable. We'll do it with Python's secrets module since we are already using Python, but there are other ways (IMPORTANT: do not keep passwords in environment variables in real production environments, we only do it here for convenience).export DBPASS=$(python -c "import secrets; print(secrets.token_urlsafe(32))")
Now to create a database and your user for it
openstack database db create exercise_3_instance $PWPGROUP-sensorhub
openstack database user create exercise_3_instance $PWPGROUP $DBPASS --databases $PWPGROUP-sensorhub
If you want to test connecting to this database, you need to do it from a virtual machine in the course's cPouta cloud or from one of your Rahti containers because the database instance only allows connections from those sources. In both cases you need to install the PostgreSQL client utility. Regardless of whether you are going to test it manually first or not, you are going to need the database instance's IP address first. You can find it by looking at its details:
openstack database instance show exercise_3_instance
The address field has two objects, use the IP from the public one. To connect manually:
psql --host xxx.xxx.xxx.xxx --user $PWPGROUP $PWPGROUP-sensorhub
If you get your password prompted and a psql prompt afterward, everything should be set up correctly.
Configuring Flask Containers
In order to make the Sensorhub app use this database instead of its SQLite default, there needs to be a file called
config.py in its instance folder. This file can override any of the default values that were used for development. We should override two: the secret key, and the database URI. However, before we move on to creating the configuration, let's talk briefly about how configuration files and secrets should be managed in Rahti.Rahti uses two concepts for configuring containers: ConfigMaps and Secrets. ConfigMaps are reusable objects that can be either written into the container's environment as variables, or mounted as a volume with each key as a file. In our case we would like to mount a ConfigMap as the Flask app's instance folder so that it creates the
config.py file there. Note that this approach is NOT compatible with mounting the instance folder from a persistent volume so if you were doing that, you need to remove the mount from your deployment.Secrets are similar to ConfigMaps but they have some additional protection to prevent you from accidentally showing it to someone who is not supposed to see it. Anyone with access to the project's Rahti environment can still get the secret as it is only one base64 encoded, and can be displayed when specifically requested. You could put the whole configuration in a Secret really, but just to show you both, what we are going to do is drop a configuration file that reads all of the actual secrets from environment variables in the instance folder using CongfigMap, and then get the secrets into the environment variables.
The configuration file contents
import os
SECRET_KEY = os.environ.pop("FLASK_SECRET_KEY")
SQLALCHEMY_DATABASE_URI = (
    f"postgresql://{os.environ.pop("DB_USER")}:{os.environ.pop("DB_PASS")}@"
    f"{os.environ.pop("DB_HOST")}/{os.environ.pop("DB_NAME")}"
)
Since this ConfigMap doesn't have any group-specific information, you can just use the one that already exists in the course's Rahti. It will be included in your Deployment file in a bit. The secrets on the other hand are group-specific, so you will have to create your own secrets. Creating a secret YML file manually is a pain because you need to base64 encode all of your values for it, so a swifter alternative is to create them with the
--from-env-fileargument. Prepare an env file like this, naming it secret, replacing the placeholders with your group's values.SECRET_KEY=<some random string> DB_USER=<username> DB_PASS=<password> DB_HOST=<ip> DB_NAME=<database>
Then create a secret from this file using
oc create secret generic $PWPGROUP-secret --from-env-file secret
These are taken into use in your Deployment file by adding suitable volume to mount the ConfigMap, very similarly to how the shared volume was mounted earlier, and by defining environment variables that are taken from Secrets. Mouting the ConfigMap we already have in Rahti is done with this under spec:
spec:
  ...
  template:
    metadata: ...
    spec:
      volumes:
      - name: sensorhub-config
        configMap:
          name: sensorhub-configmap
          defaultmode: 400
Each it is then mounted just like a shared volume. The snippet below also shows how to get one of the secrets defined above into an environment variable inside the container.
spec:
  ...
  template:
    metadata: ...
    spec:
      ...
      containers:
      - image: docker.io/mioja/sensorhub-nginx:latest
        ...
      - image: docker.io/mioja/sensorhub:latest
        ...
        volumeMounts:
        - name: sensorhub-config
          readOnly: true
          mountPath: /opt/sensorhub/instance/config/
        env:
        - name: FLASK_SECRET_KEY
          valueFrom:
            secretKeyRef:
              name: test-secret
              key: SECRET_KEY
Note that the mount path goes to a subdirectory config inside the instance folder. This is because mounting to the instance folder itself would cause unnecessary dancing around with permissions when Flask wants to write into this folder for any reason (like when creating file system cache). The sensorhub in our Git repository has been modified to read configuration from this subdirectory instead of the instance root. The full Deployment file can be downloaded from below:
Remember to change the app labels, secret names etc to match your group once again before applying this file, or take its changes and put them into your configuration file.
We showed the above way first because it shows multiple ways of doing things, not necessarily because it is the best way. Alternatively, you can also just create a configuration file that has all the information in it, and use that as a secret that you mount. This would involve simply changing the volume from defining a ConfigMap to mount to a Secret instead:
spec:
  ...
  template:
    metadata: ...
    spec:
      volumes:
      - name: sensorhub-config
        secret:
          secretName: my-secret-config
          defaultmode: 400
This approach has a few advantages, starting from just being more concise. There is no longer need to define multiple environment variables in the Deployment. It also doesn't put secrets into environment variables, which is generally preferred. Of course the file itself can be read by the user Gunicorn is running as, so if an attacker get access to your file system, it doesn't take them too much effort to reveal your secrets either. Either way, this is not a cybersecurity course, so please refer to other sources for further security considerations. The advantage of the previous approach was mostly that we can define one configuration file that can be shipped with the app itself, and will fill in blanks from environment variables. This would be more relevant with Django where configuration files are part of the application itself and are pushed into the repository.
Cleanup
Remember to clean up your Rahti containers and your database. Rahti first:
oc delete deployment $PWPGROUP-sensorhub
oc delete service $PWPGROUP-sensorhub
oc delete route $PWPGROUP
Then your database and user:
openstack database db delete exercise_3_instance $PWPGROUP-sensorhub
openstack database user delete exercise_3_instance $PWPGROUP
Deployment Task
Anna palautetta
Kommentteja materiaalista?